
Simple Astrophotography Tutorial
/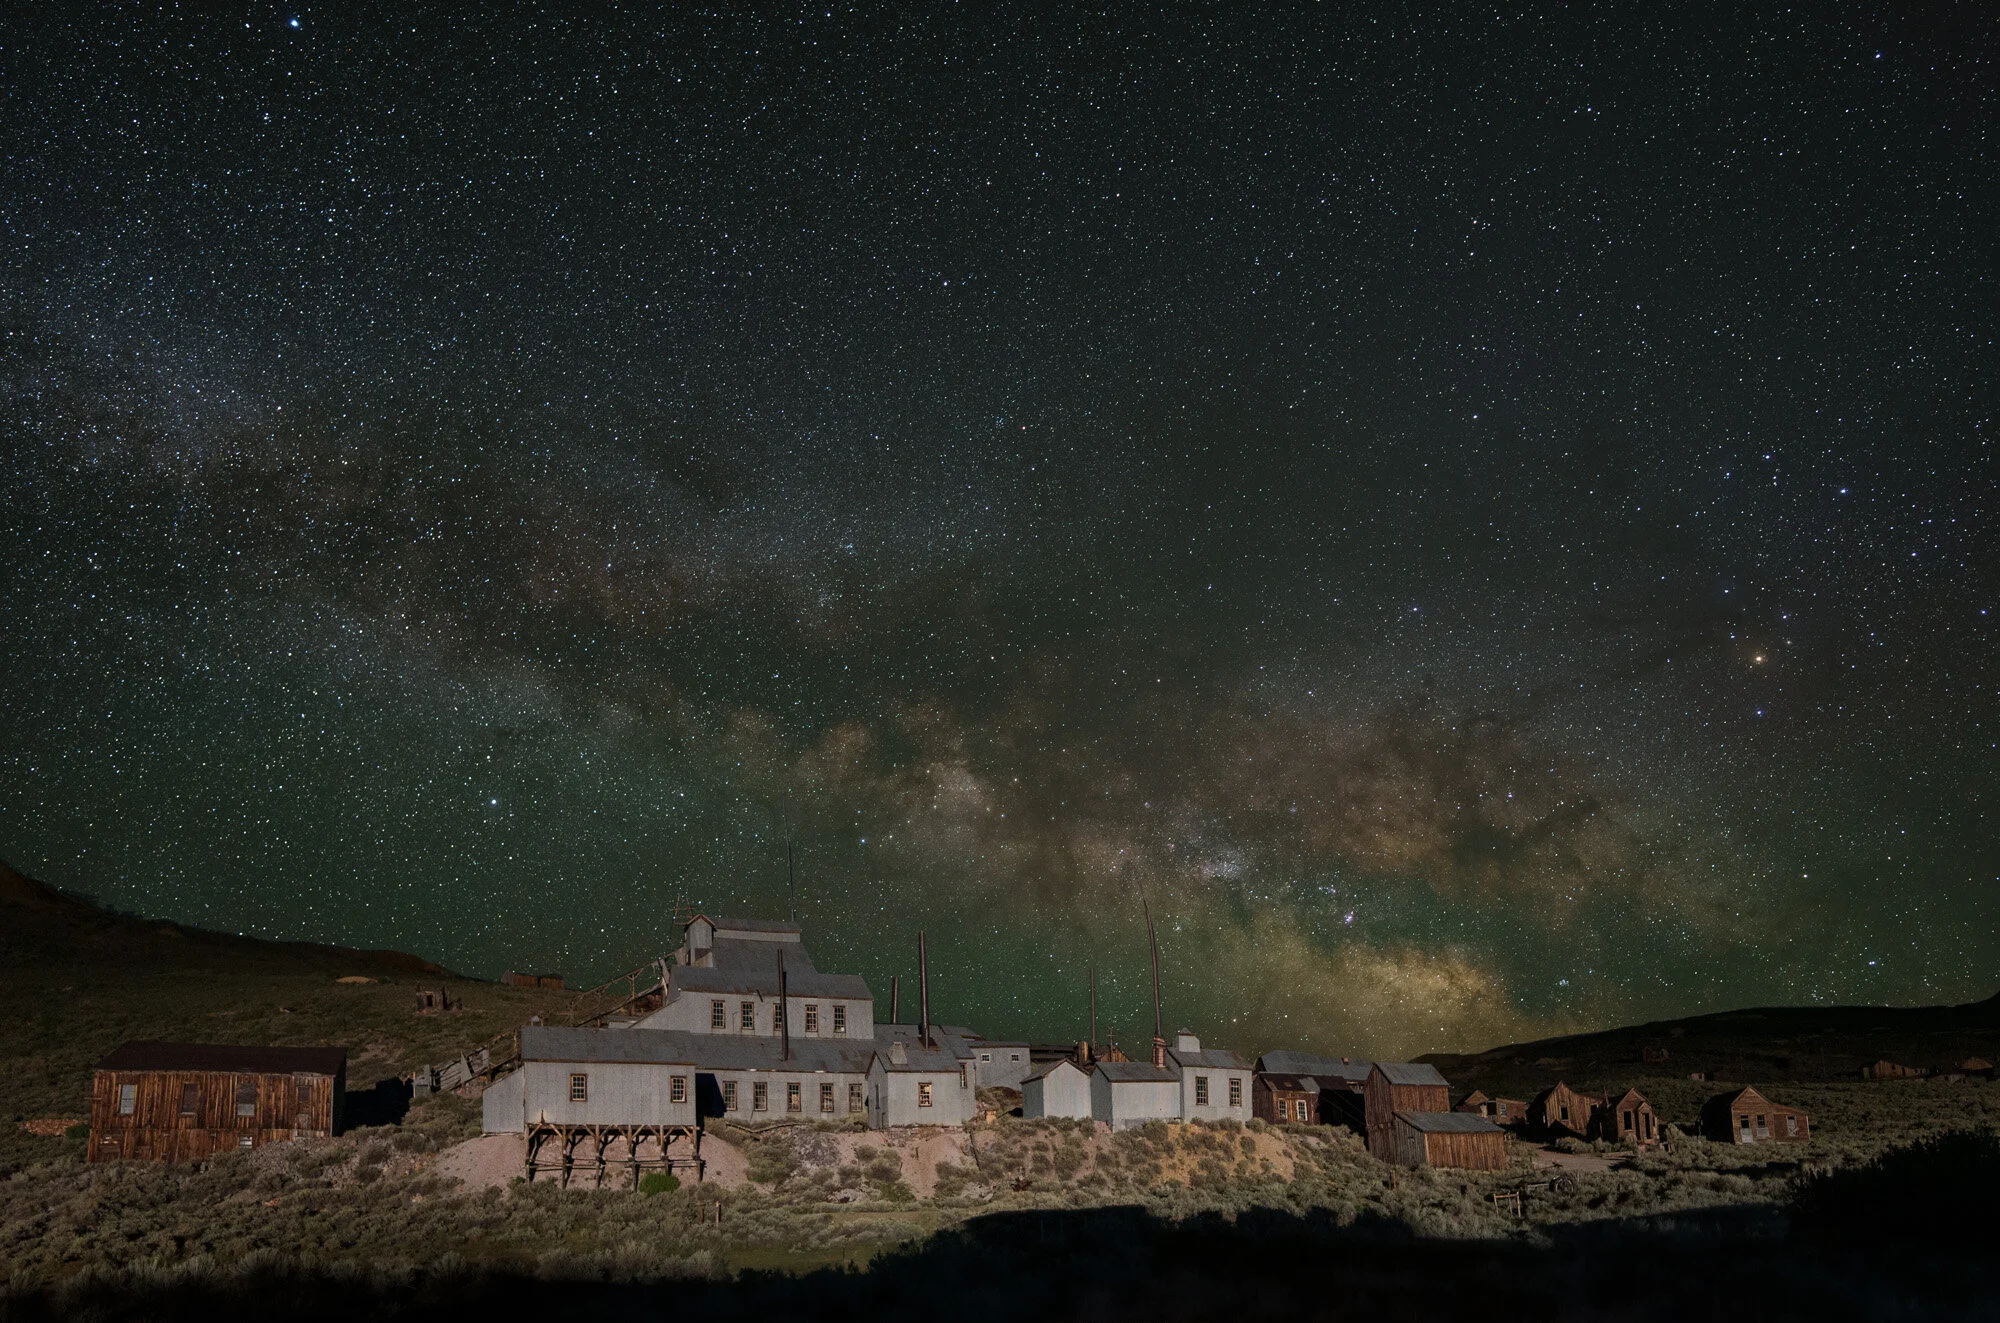
Milkyway over the stamp mill - Bodie, Ca
I want to share a quick list that can help you get out and photograph the stars.
Planning for Astrophotography
Find somewhere with darker skies (https://darksitefinder.com/maps/world.html#4/39.00/-98.00) Do not get discouraged if you don’t have the darkest skies near your home - Your camera can capture stars that you don’t see. It’s worth trying from everyone except Times Square NYC or plan a weekend trip somewhere that will take you to darker skies
Check the moon schedule - You want to find out the rise and set times and if it is rising while you are out - how full is it? If Illumination is less than 50% don’t worry and if it is full but not in the sky during the night, don’t worry :) https://www.timeanddate.com/moon/phases/
Make the plan and put in on the calendar - this can help you stick to the plan and not remember 1/2 way through that episode of Cheers that you meant to go out and shoot the stars tonight. And watch the weather. Partly clear or clear is best. https://www.cleardarksky.com/
Gather your gear - Camera, your fastest & widest lens and a tripod
Optional gear - remote release and if you will be shooting somewhere where dew appears on the grass each morning- a hand warmer and a rubber band to keep the end of your lens fog free.
Should you bring a friend - Safety is a priority and if you are headed to some place where that is a concern- certainly bring a friend along. I have however had some really special evenings under the stars all by myself and without anyone else I can stay out as late as I want.
If you are not familiar with the area where you plan to photograph - a daytime visit to your planned location can really help you see where to set up best to have an interesting foreground etc.
Preparing Gear for Astrophotography
Before you leave the house make sure you can easily put your camera on the tripod and turn live view on(DSLR), magnify the live view, & press playback and magnify that view. Now do that all with your eyes closed. Seriously. The less you rely on lights when you are out in the field the better. Also make sure you can grab the focus ring on your lens by feel and not accidentally adjust the zoom ring on the lens.
Astrophotography Settings
Camera Setup - check that the tripod is stable and secure and carefully check that you have firmly locked the camera onto the tripod before letting go - it’s easy to think everything is connected in the dark but can turn tragic quickly.
Getting Focus - For stars you want to focus at infinity. Sometimes this is lined up with the infinity mark on your lens, sometimes it is close and sometimes you don’t even have an infinity mark on the lens. The easiest way we have found to find infinity - point the camera toward the brightest star in the sky . DSLR users turn live view on, mirrorless users just use your viewfinder or the rear screen. Magnify the view to max (most cameras provide at least two levels of magnification). Now carefully turn the focus dial looking for the sharpest results. It can be tricky with the low light and noisy live view but there will be a point as you rotate focus where the star is a small, crisp point of light. Think of this like a pendulum - you are turing the focus ring watching the star(dot of light) become smaller and more defined and at some point you will “swing” past that and the star will become soft and less defined, stop and start turning back in the other direction. Eventually you should “settle” on the point where the star is the most defined.
If you have trouble finding and focusing on a star setup with a brighter light in the distance, street lamps or another light source can work. They should be at least 300 feet or 100 meters away. About the length of a soccer field.
If you have a mirrorless camera - you have focus peaking. Focus peaking outlines in focus objects with small colored dots. When used with stars the focus peaking actually completely consumes the star when the focus is achieved. I have found this method to be less reliable and turn off focus peaking for astrophotography.
Getting Composition - it’s unlikely that you will be able to see much in your viewfinder or on the LCD - I generally estimate and try for 1/3 ground and 2/3 sky. Use your camera’s level to make sure your horizon is straight.
Test Shots - I like to start around 8 second exposure, ISO 3200, and your widest aperture available to you. The resulting image might be noisy and darker than you want but it should give you a good idea about your composition and allow you to double-check focus. Zoom in on the stars. They should be sharp little dots. Adjust if necessary and shoot again.
Making the pretty photos - Once you have nailed composition and focus I typically extend the shutter speed and lower the ISO. Your shutter speed is limited by your focal length and the speed of the rotation of the Earth. The easy method - divide 300 by your focal length to get the suggested maximum speed. If you are shooting with a 24mm lens on a full frame camera (300/24 = 13) 13 seconds is the longest shutter you can use before the stars will start to streak or trail. With many high megapixel sensors, the actual time is shorter. If you plan to print you should follow the NPF rule. The Photo Pills app includes a calculator that will give you a more precise time. Typically 10-15 seconds is safe. Just keep in mind when using the 300 rule you do have to account for crop factor if not using a full camera/lens.
White Balance - Find the Custom or Kelvin Setting and set it at ~4300. Shoot RAW so you can adjust this later but I find 4300 to give me a nice midnight sky.
Shoot and shoot some more - try various compositions, and interesting foreground elements and you can even experiment with light painting the foreground. Don’t forget to shoot both vertical and horizontal compositions.
And, most importantly - Don’t forget to spend some time looking up at the sky and appreciating all that beauty.


