
Tour du Mont Blanc - Tips & Tricks | Gear Recommendations for TMB
/Hiking the Tour du Mont Blanc: The Ultimate Guide to Gear, Tips, and Tricks
The Tour du Mont Blanc (TMB) is more than just a hike; it’s a journey through three countries, countless breathtaking vistas, and a test of your own endurance and spirit. After completing this incredible 10-day trek, we’ve compiled our best advice, gear recommendations, and hard-won lessons to help you plan your own adventure. Whether you’re worried about what to pack, how to train, or the best way to carry your camera, this guide has you covered.- You can see our day by day posts here.

🥾 10 Great Tips for Hiking the Tour du Mont Blanc
Here are the most important things we learned on the trail.
1. Consider Going Clockwise Most people hike the TMB counter-clockwise, but we found clockwise to be peaceful and surprisingly quiet—especially in the mornings. We often had long stretches of trail to ourselves, and although it did get a bit busier after lunch, it was rarely overwhelming. We were never stuck behind anyone, just sometimes had to step out of the way to let people pass. Only a few segments felt truly “busy.” Clockwise offers a refreshing twist on this popular trail and lets you ease into the rhythm differently than the standard crowd.
2. Use a Luggage Service—But Still Pack Light Even if you’re having your bag transported each day, pack light. A smaller, simpler kit means less time fussing with gear and more time enjoying the trail. You really only need one or two cozy outfits to change into at the end of each day.
3. Bring a Second Pair of Hiking Shoes If you start developing hot spots or blisters, switching to a different pair of shoes can offer instant relief and help prevent further damage. If you’re using a luggage transfer service, packing a second pair is an easy and lightweight insurance policy that could end up saving your whole trip.
Also—this might be personal, but I’m a huge fan of Injinji toe socks. I alternated between those and a thin pair of Smartwool socks and never developed a single blister the entire hike. The toe socks really help reduce friction between your toes, especially on long downhill stretches.
And of course, don’t wait until the Tour to test your setup. Spend time in the shoes you plan to wear, hiking similar distances on similar rocky trails if you can. Your feet will thank you.
4. Be Smart About Food and Snacks Anytime you're in or passing through a town, consider picking up food or snacks there. It's much more affordable than at the refuges and stops along the trail. We really liked having food with us and the ability to stop whenever we wanted to eat, rather than being forced to make it to a certain refuge. That said, leave some room in your budget for treats at those wonderful locations as well—a slice of pie in the middle of nowhere is a special kind of magic!
5. Don’t Overpack Water—Know Your Sources Carrying too much water, especially uphill, can be exhausting. Instead, learn where the refill points are along your route and plan accordingly. Many refuges and villages offer reliable places to top up, but always leave a little extra room in case reports of water are unreliable.
6. Make Your Water Taste Better The science on electrolytes is mixed—some argue they’re essential, others say they’re overhyped. But when you’re hiking for 6 to 10 hours and sweating steadily, I do think they help. At the very least, they make your water more palatable, which can encourage you to drink more consistently throughout the day. I’m a big fan of Feel Goods—easy to mix and genuinely tasty - try the Lemon Lime.
7. Simplify Your Pack Take a hard look at what you’re carrying. Do you really need it? Cutting down weight and bulk makes every mile feel easier. A streamlined setup means more comfort, less fatigue, and less decision fatigue when unpacking each night.
8. Be Strategic About Timing If you’re hiking in summer, start right after breakfast. You’ll get ahead of most other trekkers and enjoy quieter trails, cooler temps, golden morning light, and less stress about afternoon thunderstorms.
9. Train for the Downhills Everyone thinks about the climbs, but it’s the descents that get you. Long, technical downhills will test your knees and your patience. Add downhill work into your prep hikes at home.
Weighted Step-Downs: Stand on a sturdy box, bench, or stair. Hold a weight (dumbbell or kettlebell) in one or both hands. Slowly lower one foot to the ground, controlling the movement with the leg that's still on the box. This builds eccentric strength in your quads, which is crucial for braking on downhills.
Lunges (Forward and Reverse): Lunges are fantastic for building single-leg strength and stability. Forward lunges mimic the motion of stepping down, while reverse lunges also help build the supporting muscles.
10. Wear Sunscreen & Use Sun Protection My partner and I did lots of hiking in prep and while we used sunscreen and generally wear a hat, I was still shocked at how easy it was to burn while hiking the TMB. I recommend sun hoodies, a hat, sunglasses, sun gloves, and sunscreen on any exposed skin, reapplied often. Even if it is a little cloudy, put on sunscreen. At those higher elevations, it is easy to burn quickly.
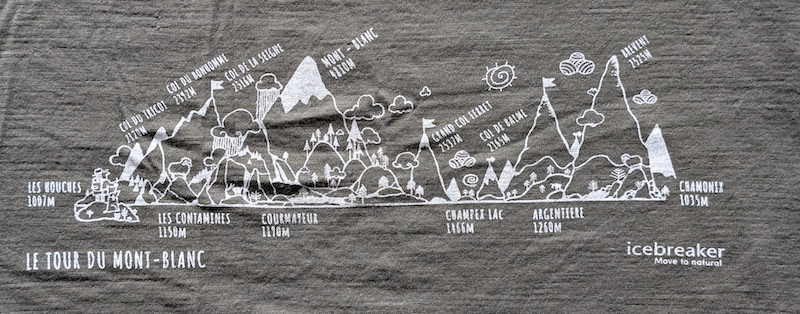
11. Best Tour Du Mont Blanc shirt?
If you’re looking for a high-quality Tour du Mont Blanc shirt, we found some fantastic options at the Icebreaker store—super comfortable, well-made, and trail-worthy. They also showed up at Snell Sports in Chamonix (map link here). Available in dark blue, light blue, and a gorgeous dusky olive. Definitely worth checking out!
🏔️ Booking and Logistics: Our Experience
We booked our self-guided Tour du Mont Blanc through Altitude Mont Blanc and have nothing but good things to say about them. They handled all of our accommodation bookings and managed our luggage transfers each day. Everything ran smoothly, which took a huge amount of stress out of the planning process and let us focus on the hike itself.
It really felt like they were thoughtful about placing us strategically along the trail—we rarely had to backtrack or wander far to reach our lodging each night.
If you’re looking for a reliable company to help with logistics, we highly recommend them. They offer several package levels; we chose the mid-tier option, which meant staying mostly in hotels or hostels with private bathrooms. Occasionally we had shared bathrooms. That package did rule out most of the refuges, as those are almost entirely dorm-style.
If we were to do it again, I think we’d pick one or two iconic spots—like Refuge Bonatti—to stay at, even if it meant a shared room.
We also heard wonderful things about Pygmy Elephant
Essential Gear for the TMB
Choosing the right gear is crucial. Here’s a breakdown of what we used and what we recommend.
Hiking Boots or Trail Runners?
This is a hot topic, and it really comes down to personal preference. I found trail runners to be perfectly acceptable for a summer TMB after the snow has melted. They are lighter and more flexible than traditional boots. I alternated between a pair of Topo Ultraventures and Altra Olympus shoes, which helped prevent hot spots. For socks, I also alternated between Injinji toe socks and a thin pair of Smartwool liner-like socks. Whatever you decide to bring, make sure you also bring a pair of lightweight flip-flops, Crocs, or some other shoe to change into when you're done hiking. Not only is this nice for your feet, but many of the refuges and accommodations along the trail require you to leave your shoes in the mudroom, so you want something to be able to walk around in besides your socks or bare feet.
Do You Really Need Rain Pants?
This is another question I see come up often. The answer is: if you're hiking during the warmer summer months of July and August, you will probably be OK without them. But know that mountain weather is famously unpredictable. In early July, it has snowed on people. In late July, as we were finishing up, we saw serious hail and really gusty, cold wind. And of course, we had a day where it rained for a big chunk of the afternoon. Even when it's warm, if you're wet all the way through, you can start to get cold fast. So, I personally do think you should have a pair of very lightweight rain pants. They can also be used as windbreakers when it's cold and dry. I really like this super lightweight pair from Outdoor Research. They weigh basically nothing, so you'll have them with you if you need them without any real weight penalty. I have weather app recommendations below so you know which days you might need them - though I pretty much always pack my rain pants.


During one downpour, I wasn’t quick enough getting my rain pants on, and my shorts and underwear got completely soaked. When we stopped, I got cold fast. Even though I was already wet, putting on my rain pants still helped—it trapped some warmth and gave my clothes a chance to slowly dry underneath. That’s the benefit of having a breathable pair of rain pants.
Pack Cover - It isn’t a bad idea to have a pack cover BUT in real rain they only work for so long - having an inner garbage bag liner or a fancy version like these Nylofume® Pack Liner is nice for peace of mind.
Should You Hike the TMB with Trekking Poles?
I'm a huge fan—and yes, I do think you should bring one or two poles. Trekking poles are incredibly helpful on downhill stretches, taking pressure off your knees and improving balance. They're also great for stability while crossing rocky, uneven terrain. Even if you don’t use them all day, having them available can make a big difference when you need support. I am happy to recommend Black Diamond’s trekking poles if you plan to use them beyond the TMB, but if you are on a budget, try posting in the TMB Facebook group and see if anyone else is selling or even passing along some poles.
Do I need cash?
We found that almost all the in-town accommodations, restaurants, bakeries, and so on accepted cards. However, many of the refuges did take cash—euros were fine. Just note that when you’re passing through Switzerland, you might sometimes get change in Swiss francs.
Meteo - Excellent Weather App. Remember to check your location, the pass you will likely be crossing and your destination’s weather to get a sense of what you might experience each day.

We had no cell service inside the purple area - that took us about 24 hrs to get through - from noon on day 8 to noon on day 9. Just FYI
We found that Google Fi (for U.S.-based customers) and Airalo (an eSIM provider) had connectivity just about everywhere along the trail—except when coming in and out of Les Chapieux. (See map above. We went about 24 hours without service, and the hotel there didn’t have Wi-Fi.)
That said, don’t assume you’ll have reliable connectivity on the trail. If you’re using your phone for navigation, be sure to download your maps ahead of time. And honestly, it’s nice to disconnect for large portions of the TMB anyway.
If you absolutely need to stay in touch with people at home—or want a way to check the weather reliably—consider a Garmin inReach Messenger or similar satellite device. I use this for my more remote workshops, and it’s an excellent tool when staying connected is non-negotiable.


