Arctic Adventure - McKay Photography Academy and Poseidon Expeditions
/A quick look at our photography adventure from the drone. More photos and video will be added soon. Feel free to hit the share button to share with friends and family.
A quick look at our photography adventure from the drone. More photos and video will be added soon. Feel free to hit the share button to share with friends and family.
The June 2022 update to Lightroom Classic (11.4) now makes it possible to save an AI mask in a preset making it possible to 1-click edit. My Lightroom Classic Workflow is now 150% faster and I show you how to build your own presets or download mine for free (scroll down).
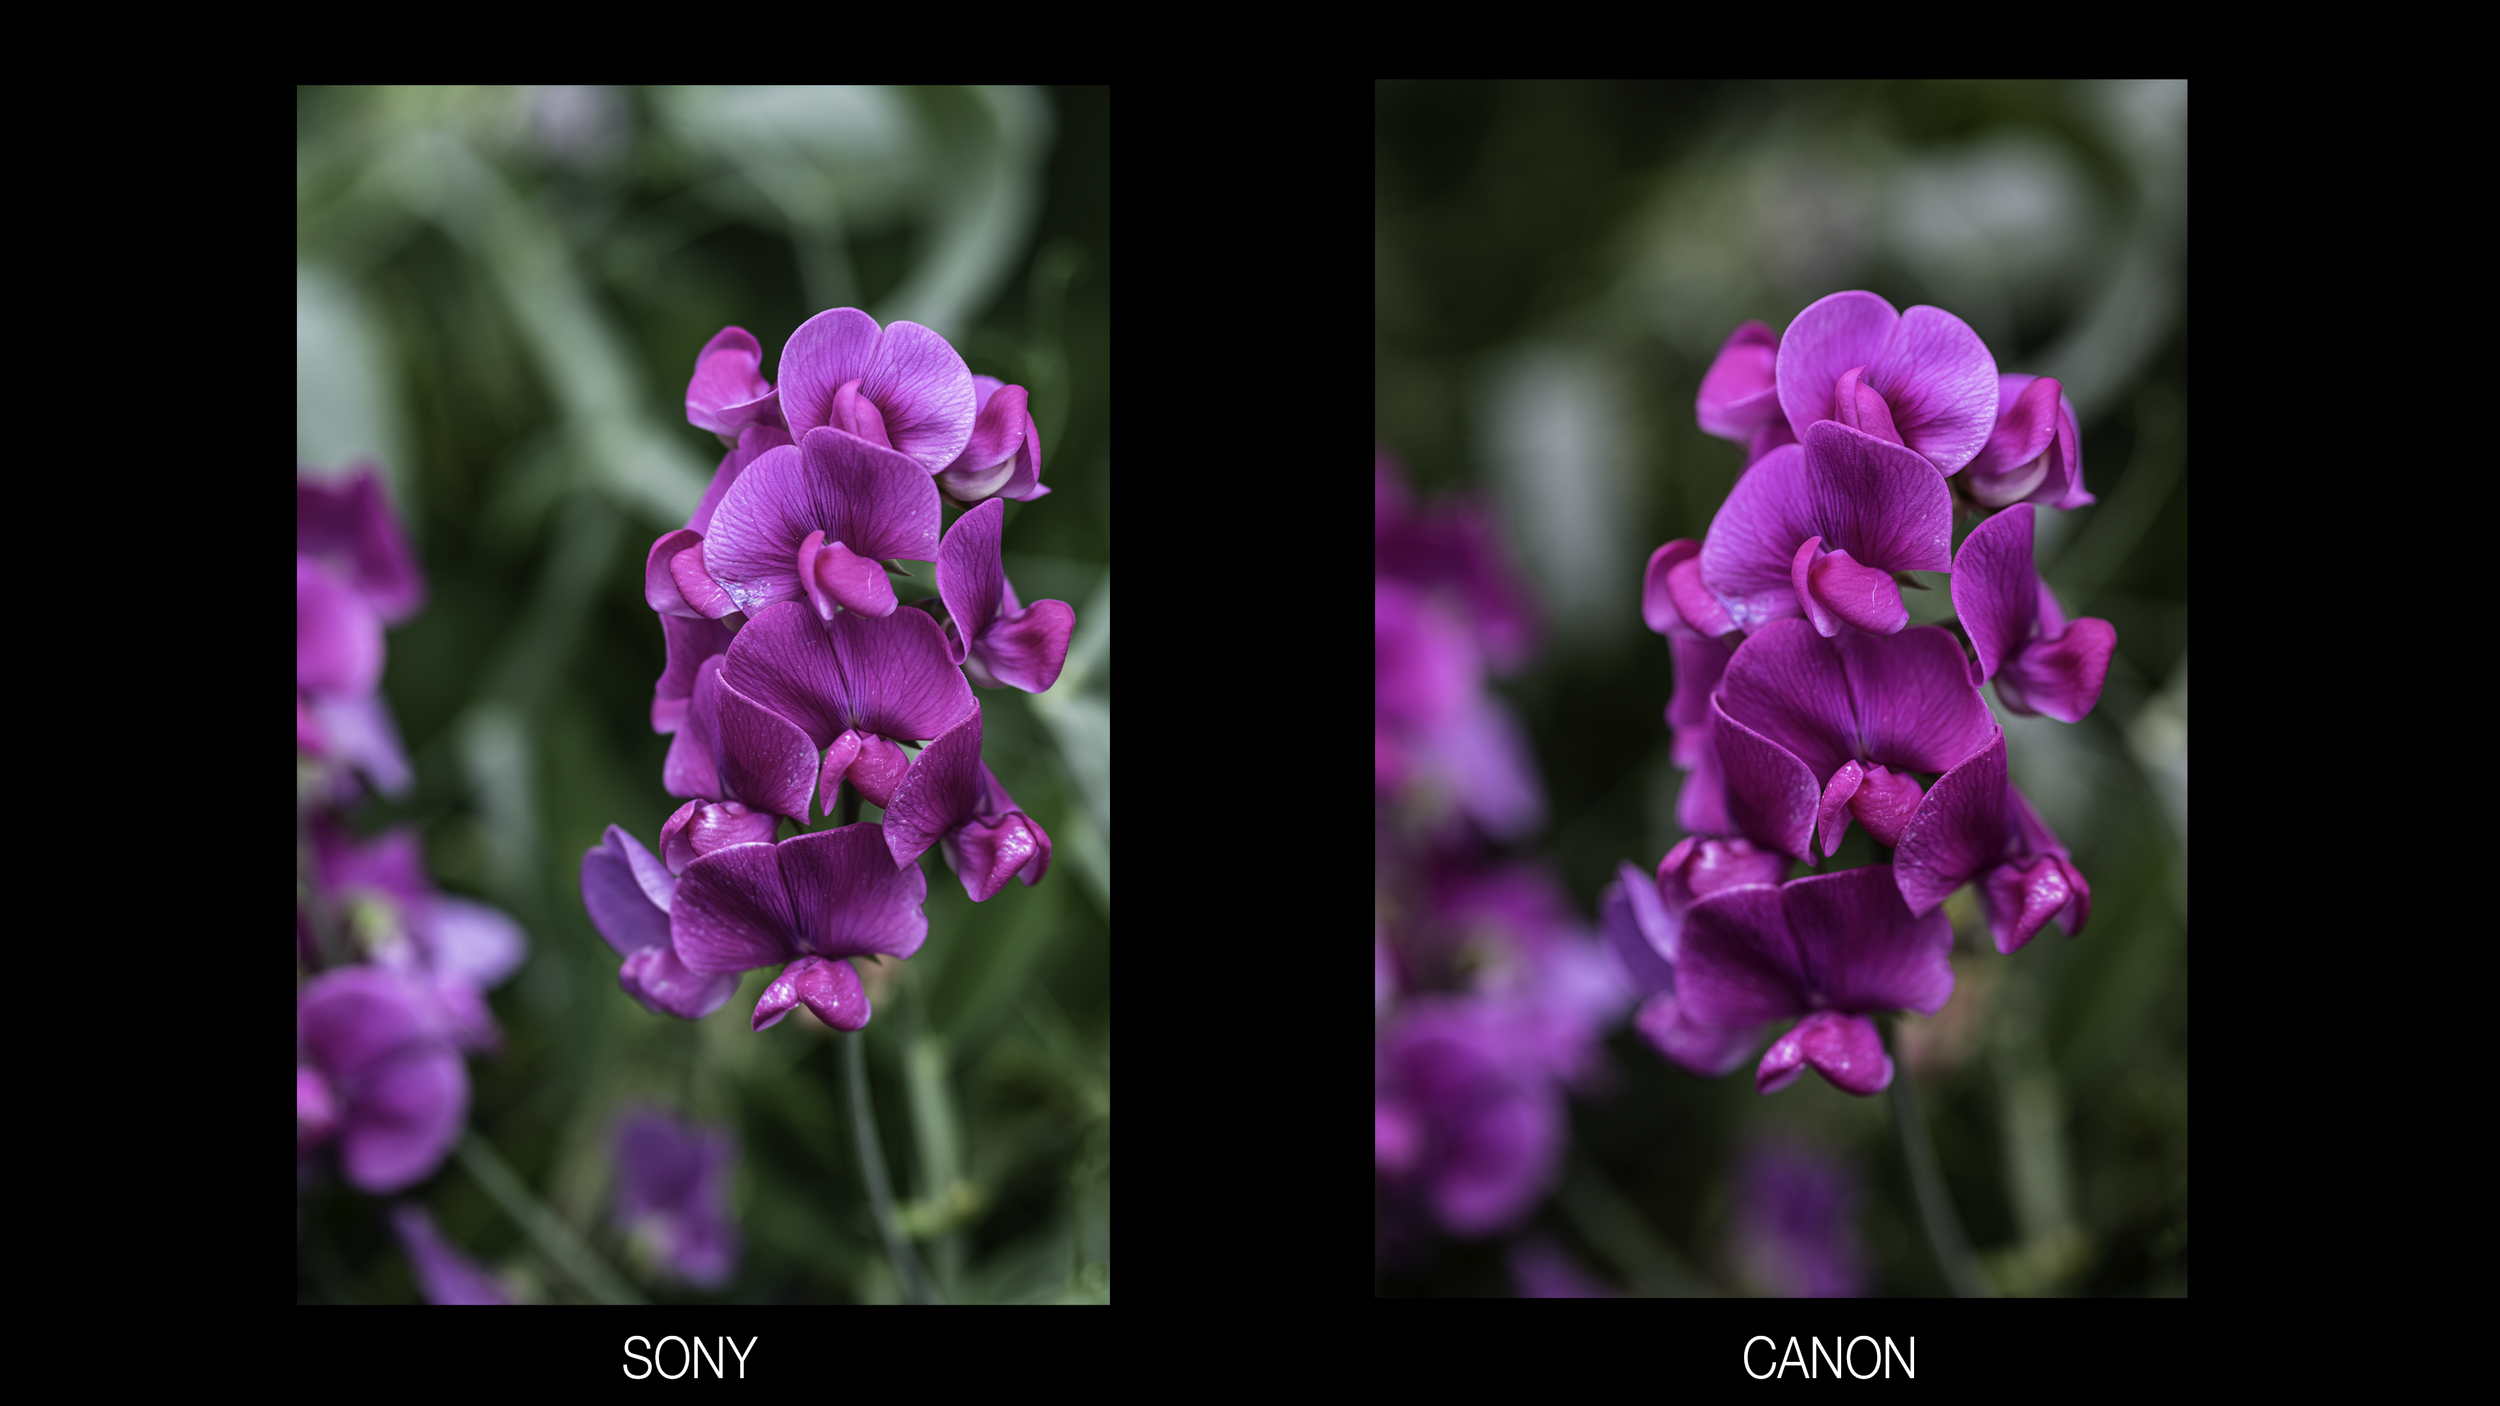
The Canon RP, a $999 camera is better than the $6500 Sony a1, Sony's flagship mirrorless. It is better by some measures. I share my list of Canon RP Pros and Sony a1 Pros and give you a chance to tell the difference between images from both cameras. < Answers are now on this page
Is this a fair comparison? No -but it is a great reminder that all current cameras on the market do a great job of taking photos - just some may be better suited for certain tasks than others and if you don’t need those features you are just fine buying the more affordable camera.
The Canon RP offers the following advantages over the Sony a1
Lighter and smaller
Better touchscreen experience
Visible Charging Light
Bulb Timer
Focus Stacking
Innovative Telephoto Lenses
$5500 Cheaper
The Sony A1 offers the following advantages over the Canon RP
More Megapixels
Higher dynamic range with better low light high iso performance
Faster and more responsive autofocus and Animal and bird Eye Af
Faster top shutter speed 1/8000 sec vs 1/4000 in RP
Faster flash sync speed
Larger buffer
More white balance presets with white balance bracketing
Anti-dust shutter mechanism
Higher resolution rear screen
MUCH higher resolution viewfinder with faster fps and no blackout
Electronic shutter fast enough for fast action
Stabilized sensor
8k video and 4k video without a crop
4k slow-mo
USB 3.2 connection for WAY faster connection
Full-size HDMI port
More than double the battery life.
Huge Savings currently on the IQ bundle which includes DeNoise, Sharpen and Gigapixel - Use code IQBUNDLE15 to save an additional 15%Battling Noise and Topaz DeNoiseAi - is it Magical?
I have been testing Topaz DeNoiseAI and I was impressed with the level of noise reduction while maintaining detail. But, I don’t want to just make this an ad for Topaz so I have shared some tips and tricks for dealing with noise while you are out photographing, while you are editing in Lightroom and shared a few examples where Topaz produced much better results.

ISO 16,000 vs ISO 100
Let’s make sure we are all on the same page about noise and how to avoid it when photographing
Noise - the grain and specks that appear in your photo, especially noticeable at higher ISOs or in darker areas of the photo after you raise exposure when editing. Noise is annoying because it reduces the clarity and details of your photo. Some higher ISO photos will end up in the trash because of the loss of detail.
Quick Tips to avoid noise/higher ISOs - All things being equal - when photographing the only way to lower your ISO is to either lengthen your shutter speed or open your aperture (e.g. going from f/4 to f/1.8)
If shooting static subjects put your camera on a tripod to shoot at a slower shutter speed.
Open your aperture to its widest setting or change lenses to one that provides a wider maximum aperture.
Handholding your camera? Get your safe shots where you know your subject will be sharp even if that means a higher ISO. Then you can lower the shutter speed below the recommended speed (2x your current focal length) and shoot a burst of photos. Continue this process lower and lower, remember as you lower the shutter speed you will be able to lower the ISO.
Move to an area with more light or add more light to your subject.
Avoid underexposing if you will need to brighten when editing. Raising the exposure in your editing program will increase the noise in the shadows.
Note - in any situation don’t be afraid of selecting the settings that you need even if it means your ISO will be higher. Simply put, do not sacrifice your settings just to try and minimize noise. Noise is often very fixable and a blurry photo or one where the depth of field is too shallow is much less fixable.
How much noise is too much noise? There is no easy answer here. Photos with strong impact - real heart and soul - I can deal with a larger amount of noise, maybe the noise is even part of the story. But if your image is more clinical feeling - I want it to be relatively noise-free and I certainly wouldn’t want so much noise that detail or sharpness is negatively impacted in those photos.
Fixing Noise
Removing noise is easy! Removing noise without losing detail is the challenge.

You can see the photo on the left has noise. The photo on the right has no noise but it also has lost a serious amount of detail. It has been mushified.
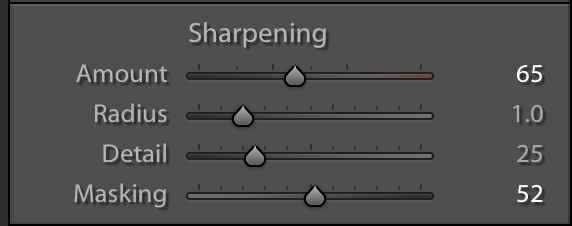
Lightroom has a dedicated Detail Panel for detail and noise reduction. The panel is capable of removing noise but in my recent tests, Topaz DeNoise AI does a better job, especially in photos with lots of fine detail. But first, let’s briefly look at these sliders.

The Luminance slider removes the monochromatic noise that is shown as grain. The higher the number the more aggressively Lightroom removes the noise and sadly the detail.

Luminance slider set to 0, 50 and 100 respectively
The detail slider allows you to bring back … detail - the higher the number the more it tries to dig out detail - I find that this often introduces some splotchy areas.
The contrast slider attempts to bring back contrast - the higher the number the greater the increase in contrast - I find that this too often introduces some splotchy areas.
The Color, Detail, and Smoothness slider combat color noise.

The photo on the left has the color slider set to 0, see the colored grain? The photo on the right has the slider set to 50. The colored grain is gone. The monochromatic grain remains.

My Personal approach to reducing noise in Lightroom is to be very gentle with these sliders. Move them just enough to combat noise without losing detail. And, I often use the local area adjustment tools to more aggressively remove noise in the less important areas of the photo (non-subject, non-detail rich areas).
Here I used the brush tool to brush on -100 texture, -100 clarity, noise 100 (this is noise reduction), and sharpness -100. I don’t typically use settings at their max but this shows you how easily you can combat the noise with a little local area adjustment
You also want to be very careful with the sharpening sliders - as you increase the detail slider it will increase the noise. Be sure to use the Masking slider to remove the sharpening from areas that don’t need sharpening. Hold down the Alt key(Mac) or Option key(Windows) to get a helpful high contrast view that makes it clear where you are removing the sharpening.
Is Topaz DeNoiseAI that much better? Yes.
The degree to which it is better depends on the photo and the level of detail but in general, I find Topaz easier to use and it produces better results.

Two Modes in DeNoise AI
DeNoise AI provides four sliders and has provided great results in my testing.
AI Clear is more simplified and I find it does not do as well as DeNoise AI.

The Auto-Detect setting attempts to analyze the photo and sets the values accordingly. I find that I almost always make additional adjustments and only suggest them as a starting point.
Low Light Mode is excellent at removing color noise.

DeNoise AI on the left vs Lightroom Noise Reduction on the right

DeNoise AI on the left vs Lightroom Noise Reduction on the right

DeNoise AI on the left vs Lightroom Noise Reduction on the right

Left original RAW straight out of camera. Right is after quick topaz Denoise adjustments..
Three examples where the noise reduction is far superior to Lightroom. Especially when you take the time to compare the quality of the higher detail regions. DeNoiseAI is able to remove the noise without reducing the details to mush. There are some drawbacks to introducing DeNoise AI.
Downsides -
A separate expense and program to run- Currently $41 USE CODE: SKEYS15
Creates a separate file without your Lightroom editing history.
Limited zoom views available - Cannot fit the entire photo on the screen.
Slow to update after every change.
Very slow on larger files and I find it slows my whole machine down when processing. Older computers may really struggle to process files.
Topaz offers a free 30-day trial and I do recommend the program and the cost if you find yourself consistently battling noise in your photos.
Toby

Exposure Info: 15 seconds f/4.0 ISO 400
Exposure Info: 1/1000 f/2.8 ISO 400
Exposure Info: 1/800 f/8.0 I SO 100
Exposure Info: 1/250 f/2.8 ISO 100
Exposure Info: 1/800 f/8.0 ISO 160
Answers Below - Canon RP vs Sony a1
The best photo related prime day deals 2022
Read MoreSigma has just released the Sigma 16-28mm f/2.8 DG DN Contemporary Lens for Sony and Leica L mount systems. I test the lens in Olympic NP and compare it to the Tamron 17-28 f/2.8 lens for Sony.

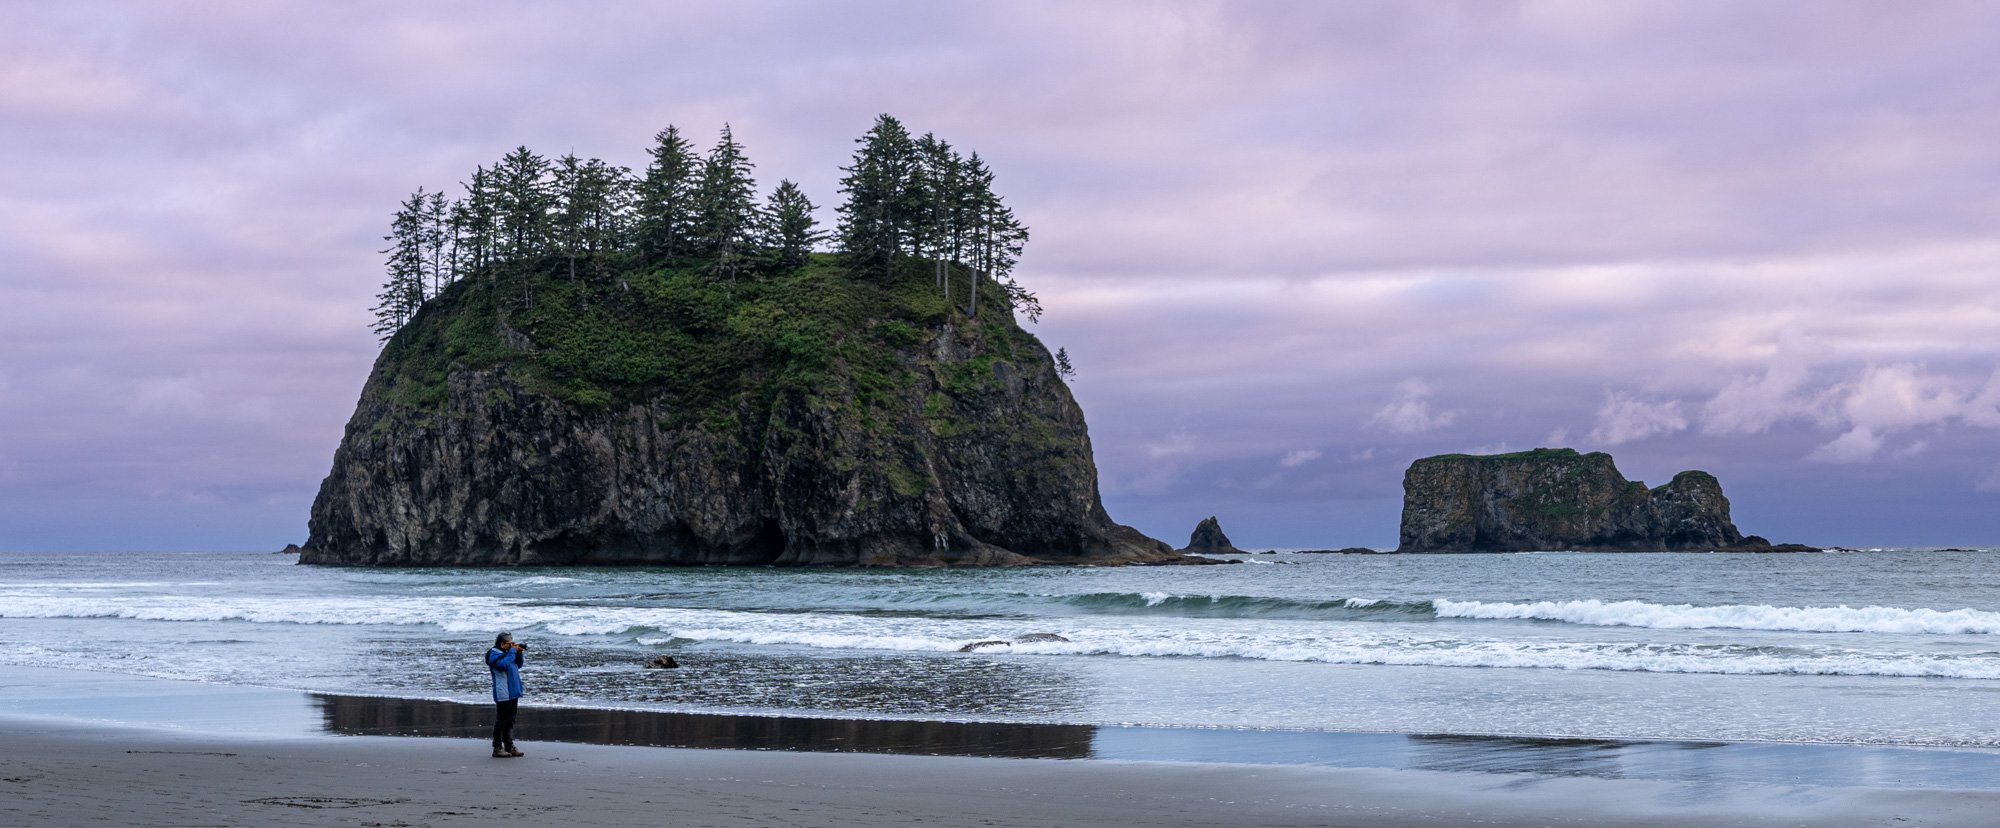
We just wrapped up our Olympic National Park workshop. We hit the highlights - snow capped peaks, the stunning coastal beaches, waterfalls and this year we had an awesome low tide, bald eagle day (26 eagles together in one place!!) and I added a new location that was a real hit. I will lead this tour again next year - roughly mid-June start. Want to be notified when it launches? Add your name below.


Looking for a basic astrophotography tutorial?
Samyang 14mm f/2.8 ED AS IF UMC [All Mounts on B&H Photo] ~ $430
IRIX 15mm f/2.4 Firefly Lens [All Mounts on B&H Photo] ~$399
Rokinon 24mm f/1.8 AF Compact Lens for Sony E [B&H Photo] ~$399
Samyang AF 14mm f/2.8 Lens [All Mounts on B&H Photo] ~ $550
Sony FE 20mm f/1.8 G Lens [B&H Photo] ~$900
Venus Optics Laowa 15mm f/2 Zero-D Lens [All Mounts on B&H Photo] ~$750
Sony FE 24mm f/1.4 GM Lens [B&H Photo] ~$1400
Sony 14mm f/1.8 GM Lens [B&H PHoto] ~$1600
Canon RF 15-35mm f/2.8 L IS USM Lens [B&H Photo] ~$2400
Nikon NIKKOR Z 24mm f/1.8 S Lens [B&H Photo] ~$900
Nikon NIKKOR Z 20mm f/1.8 S Lens [B&H Photo] ~$1000
Sigma 14mm f/1.8 DG HSM Art Lens [All Mounts B&H Photo] ~$1600
Sigma 20mm f/1.4 DG HSM Art Lens [All Mounts on B&H Photo] ~ $900
Do you have a favorite lens for astrophotography? Leave a comment below.
Sony's THREE new APS-C lenses - 10-20 f/4, 11mm f/1.8, 15m f/1.4- Hands-on!
Read MoreMy quick review of the new DJI Mini 3 - a tiny powerhouse of a drone.
Read MoreWe have ONE spot that just opened for our Sept 2022 Photography Workshop.
Workshop info and registration
Highlights from the 2019 trip -
A few photos from the 2021 trip
Happy Birthday, Yellowstone National Park - Celebrating 150 years!!! We just finished our Winter Yellowstone 2022 workshop and I put together a short video with the highlights of the two days in the park. If you have visited in the summer it is a very different experience in the winter. The crowds are gone, the wildlife is out and the scenic snow-covered landscapes are gorgeous!
Join us in 2023 - https://forms.gle/6iN2kHLfT9hbAZYw8
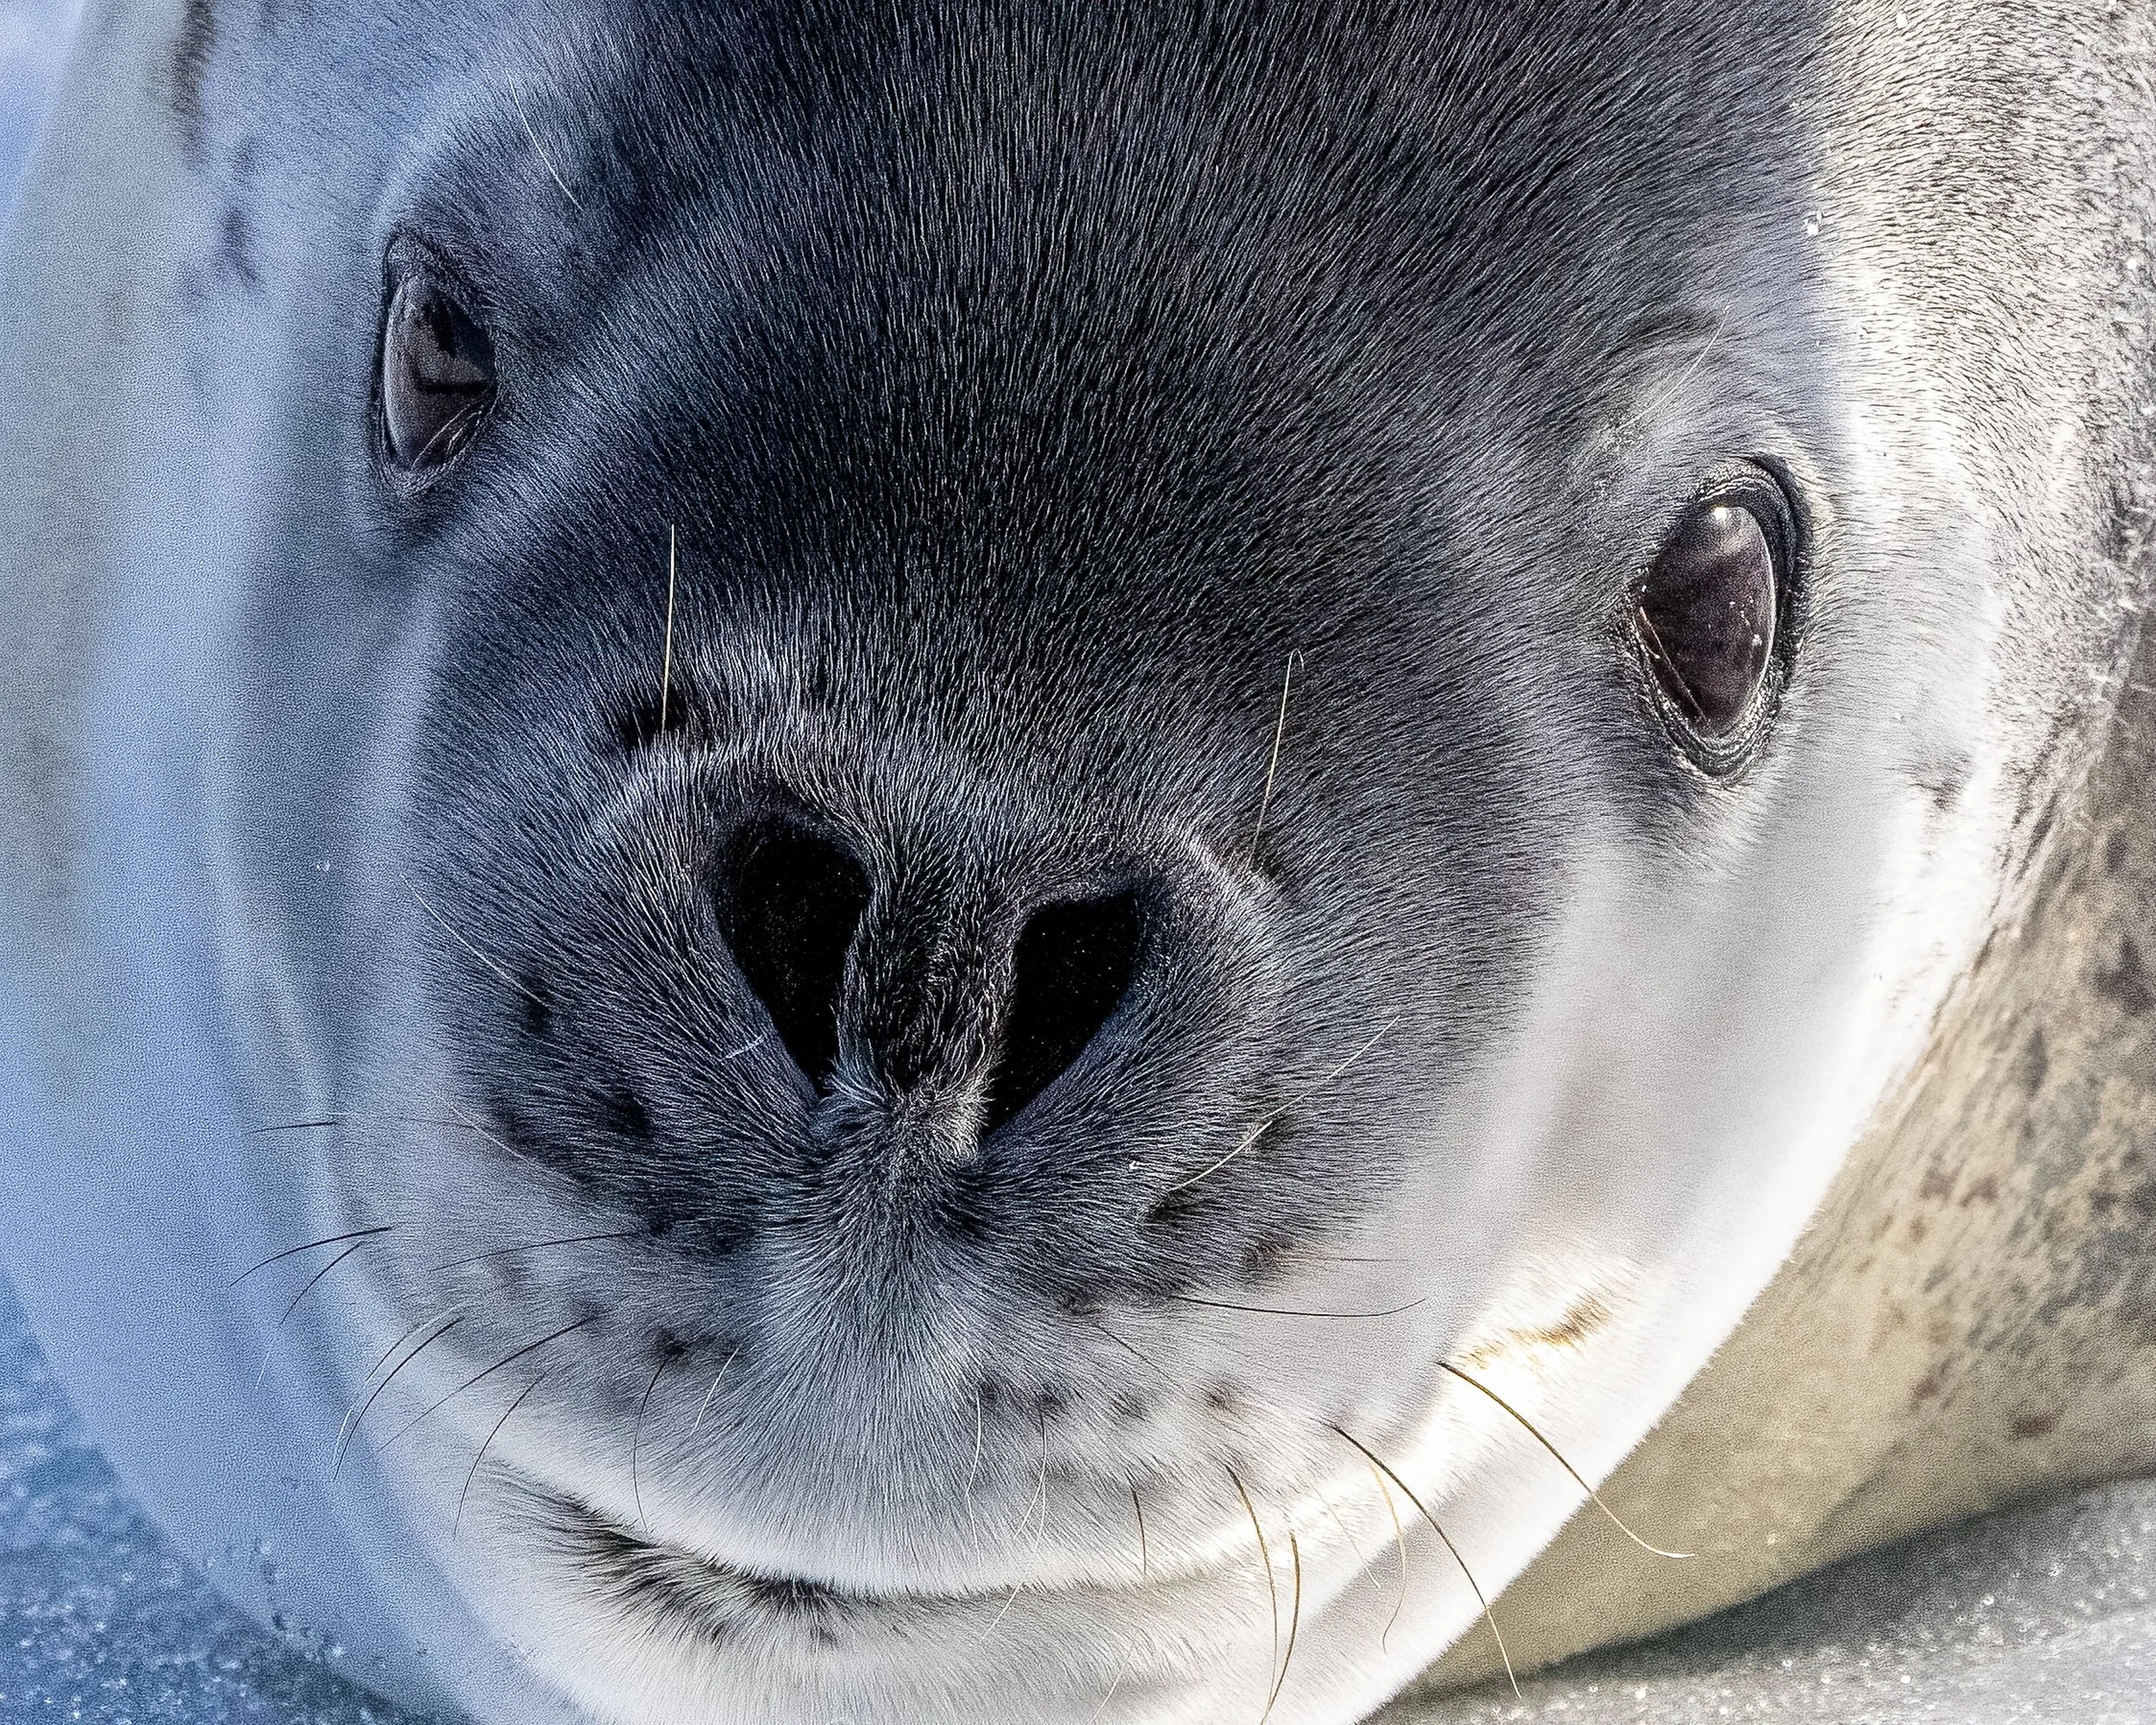
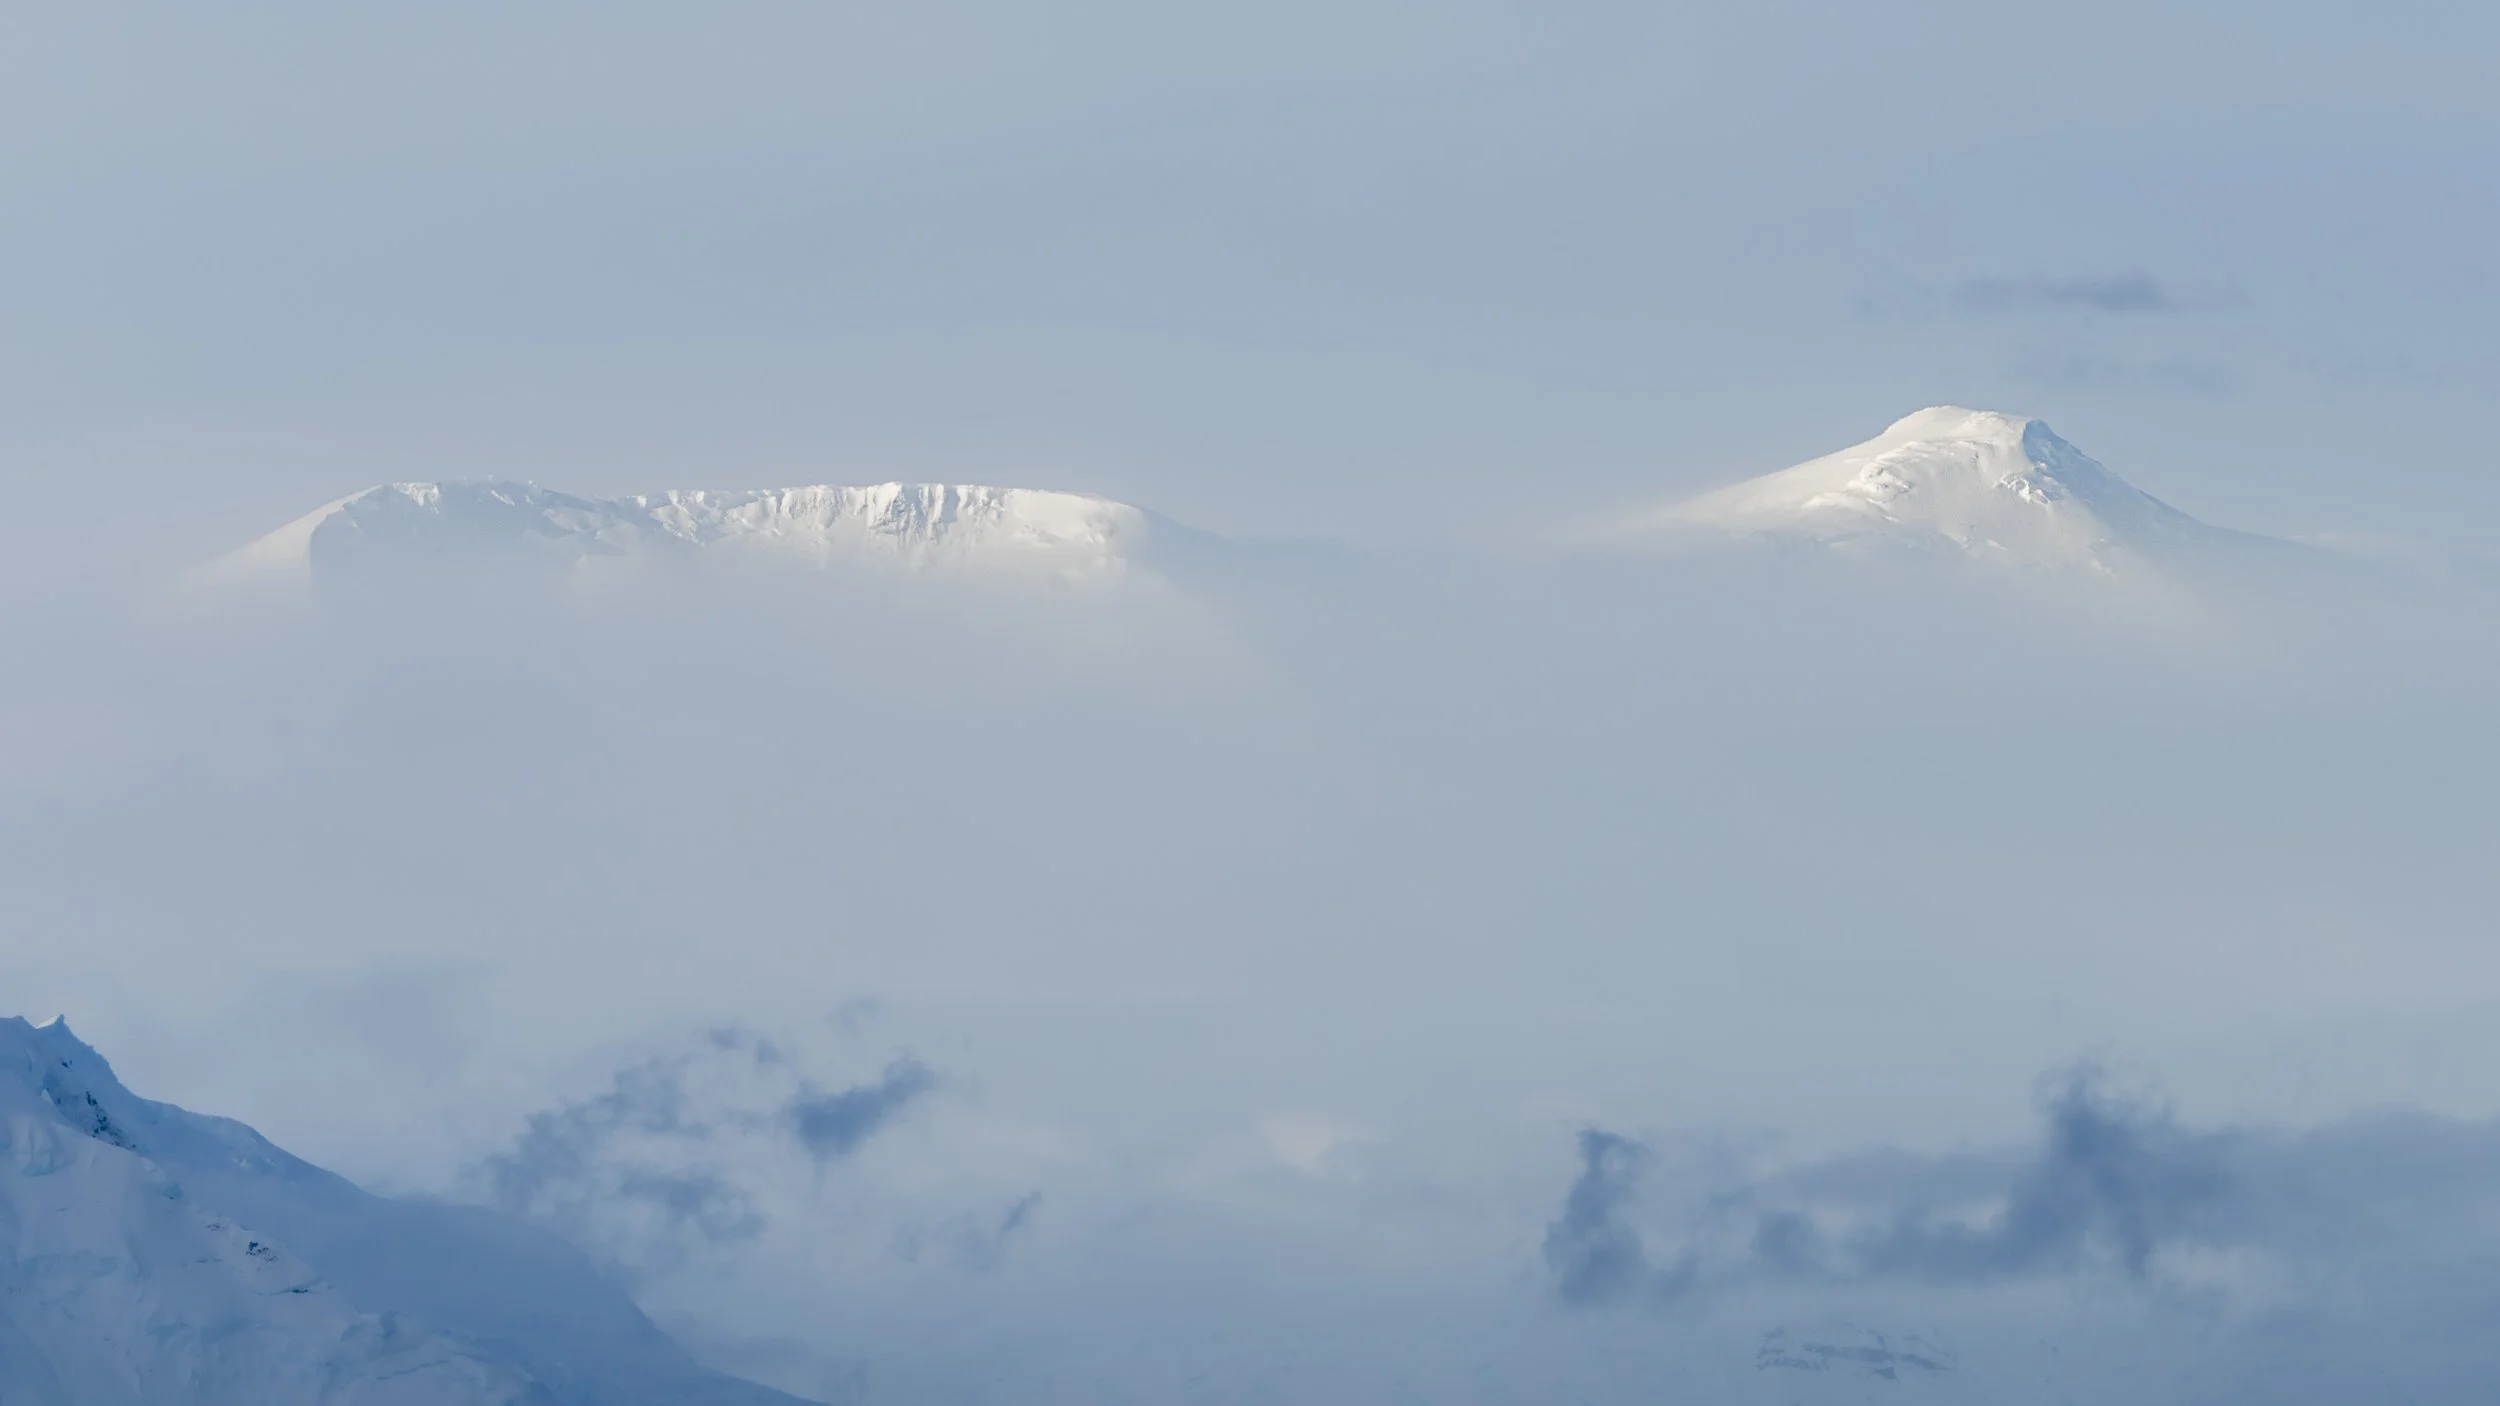
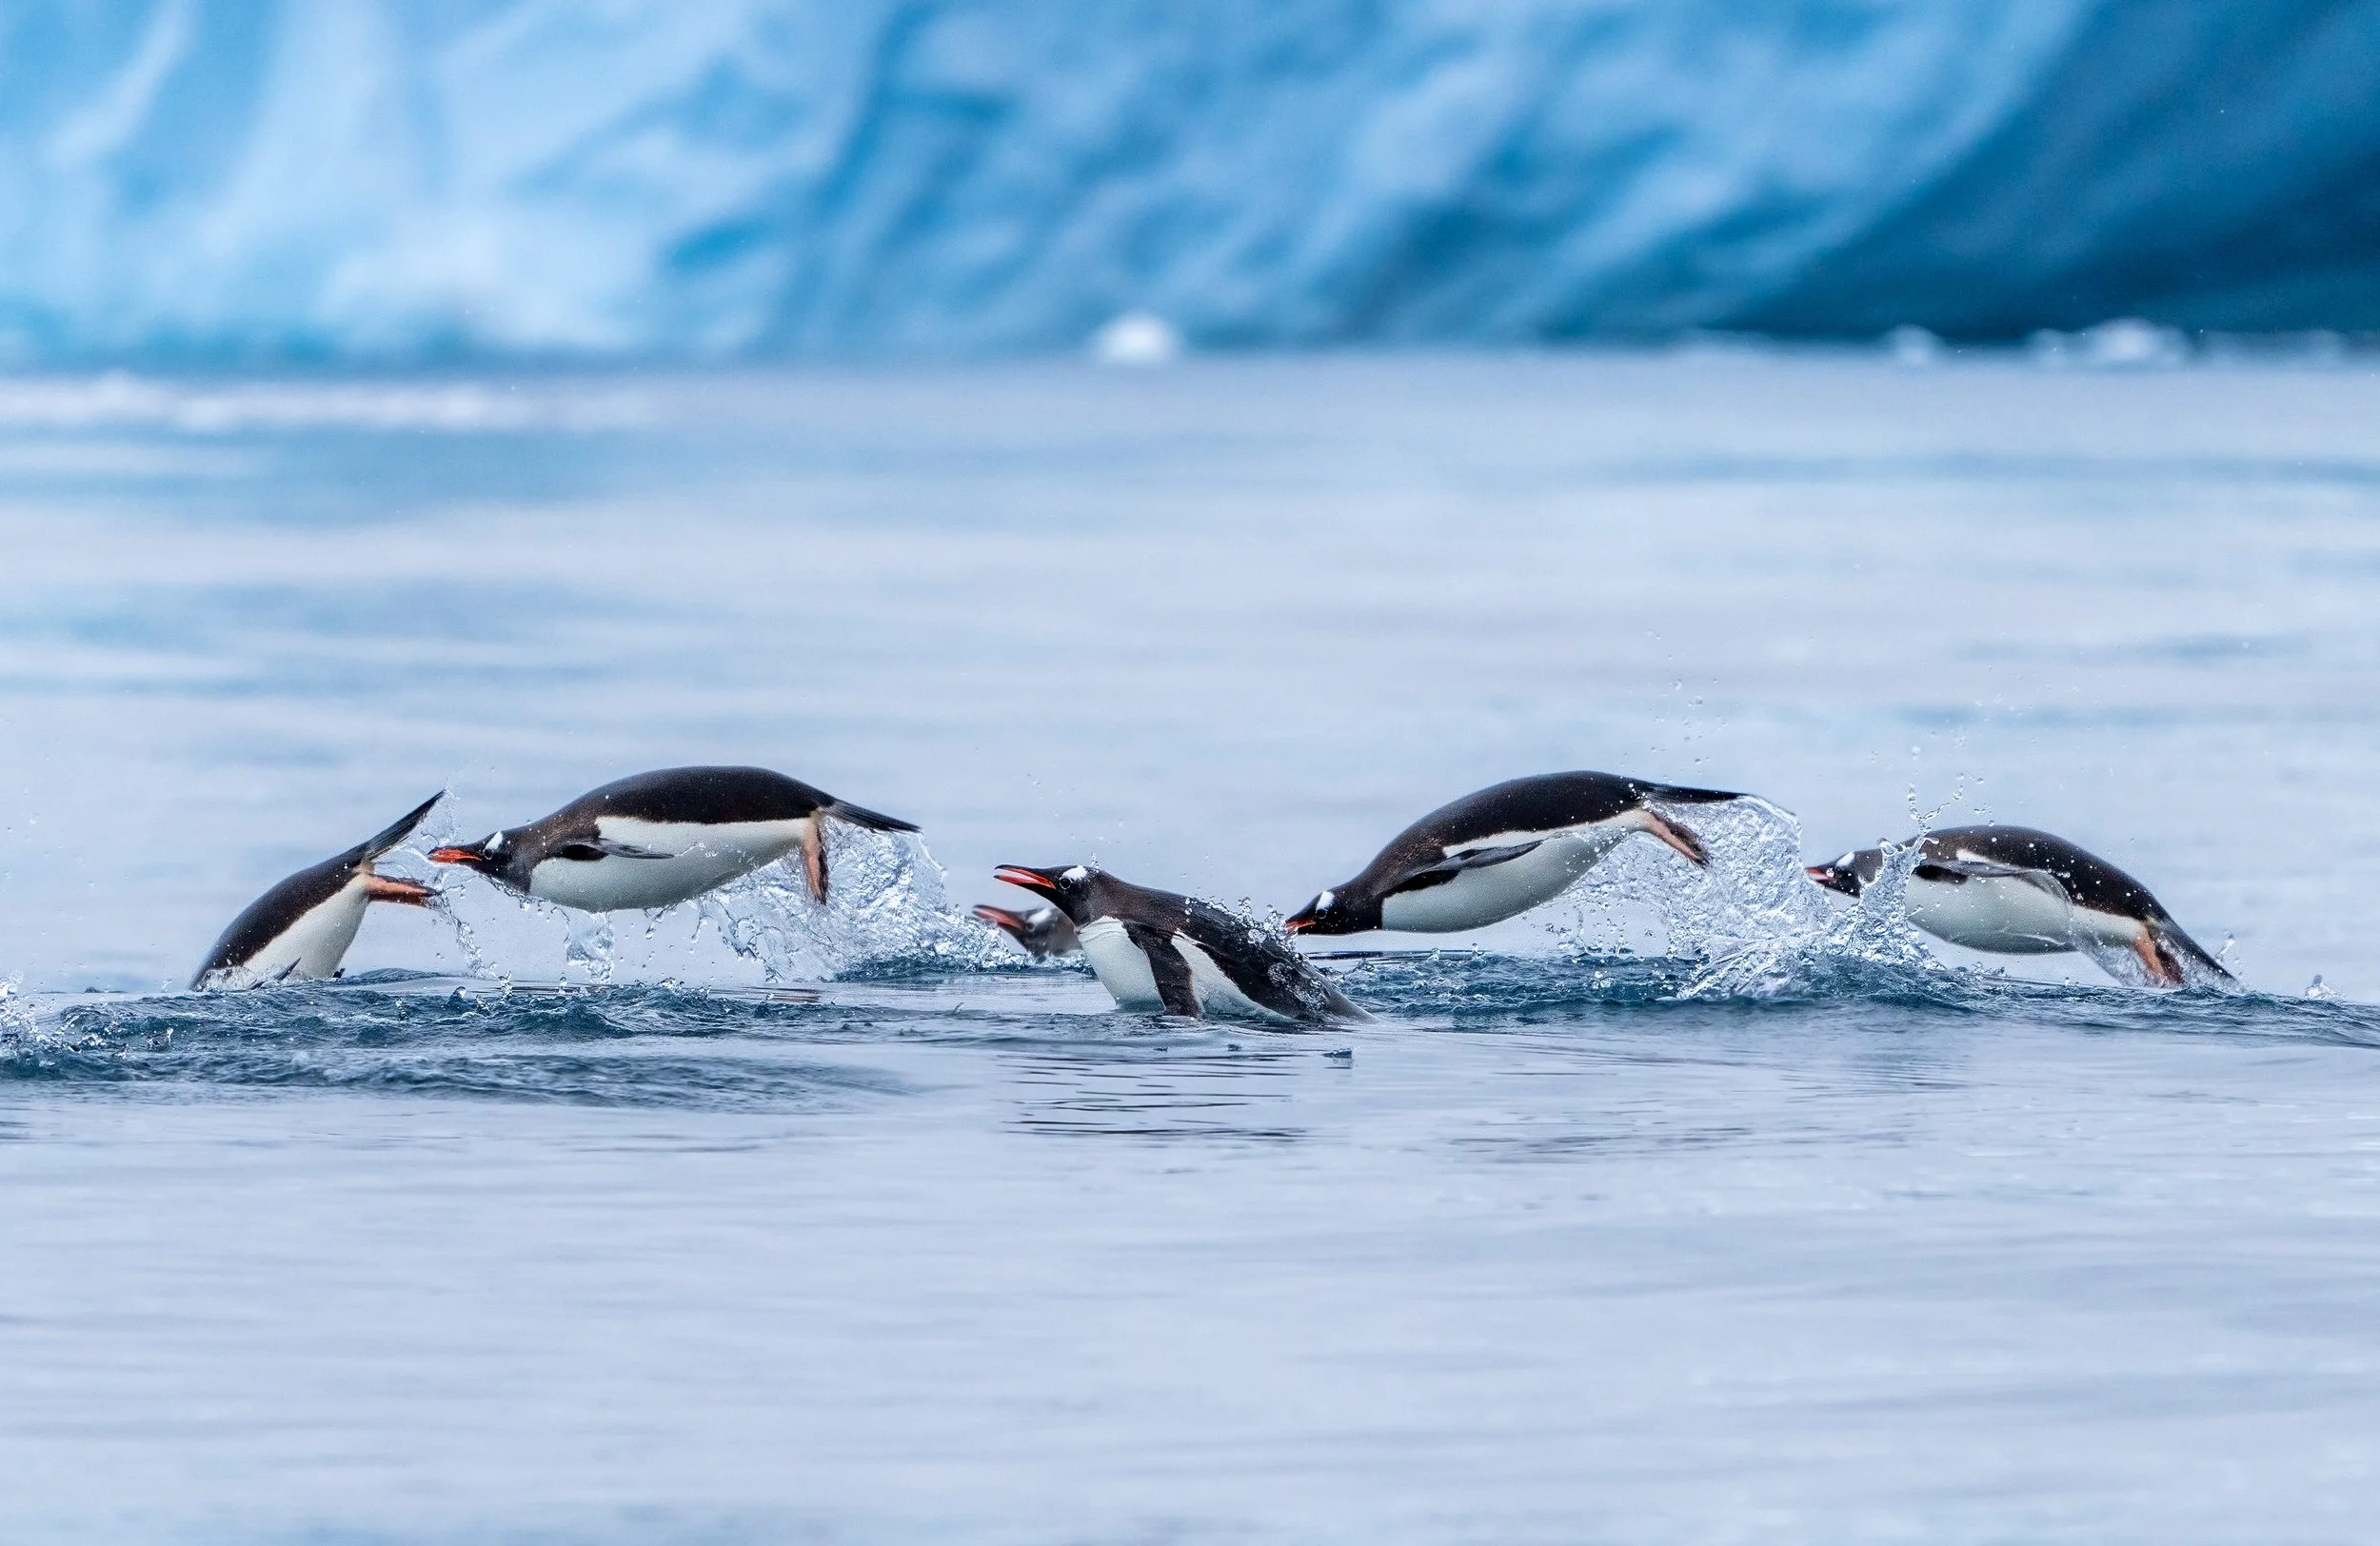
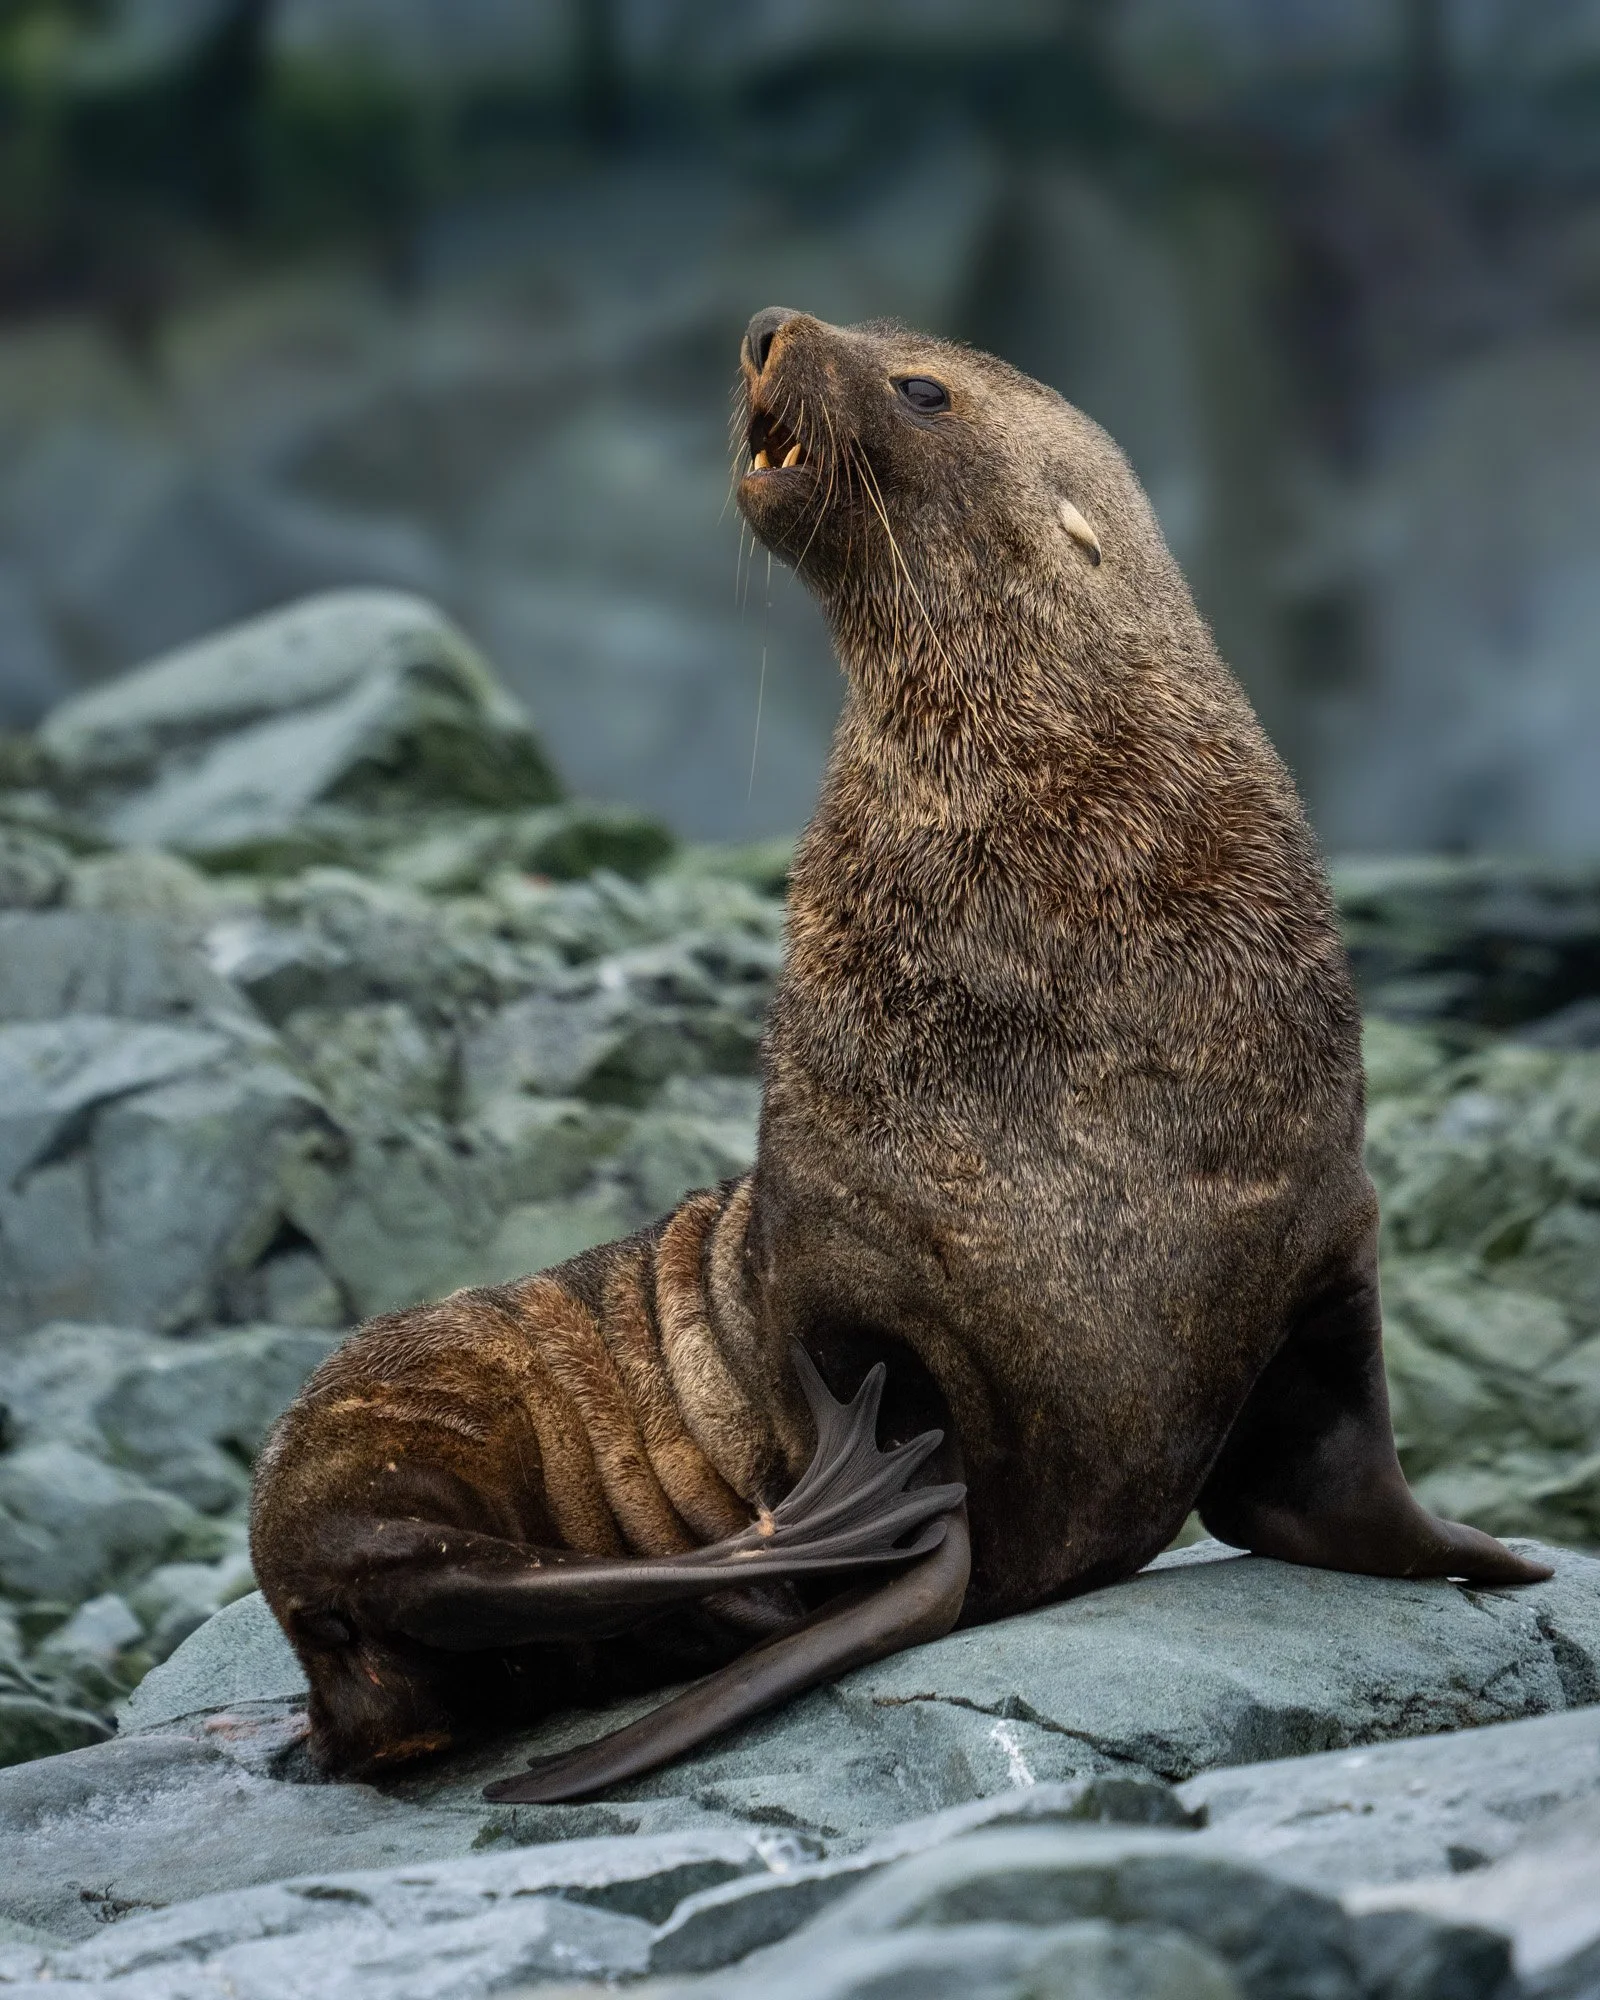
Scroll down for my favorite Antarctica Photos
It is very difficult to get permission to fly a drone in Antarctica but with the help of my friends at Poseidon Expeditions and McKay Photography Academy I was able to once again fly in Antarctica - it feels special and it is special to capture such an incredible place this way - Please watch full screen. Also big thanks to Steve Scurich for being my spotter and catcher - it's no simple task to safely bring a drone down to a small zodiac bouncing around in the Antarctica Ocean.
This was filmed with the Mavic 3 Cine version in mostly ProRes RAW. I am part 107 certified and was operating with the permission of IAATO under Poseidon Expeditions. DO NOT bring a drone to Antarctica without prior permission.
See my video on drone recommendations for 2022.
Photos from Antarctica 2022
Year-end photo deals at B&H Photo
Read MoreText UPDATED with Mavic Mini 3 Pro (May 10, 2022) - Scroll below video for more info.
There are a couple of common questions I get here at Photorec.tv. What drone should I buy? Is certainly near the top of this list. As we move into 2022 here are my recommendations for the drones you should buy along with us some accessories that are worth adding to your cart.
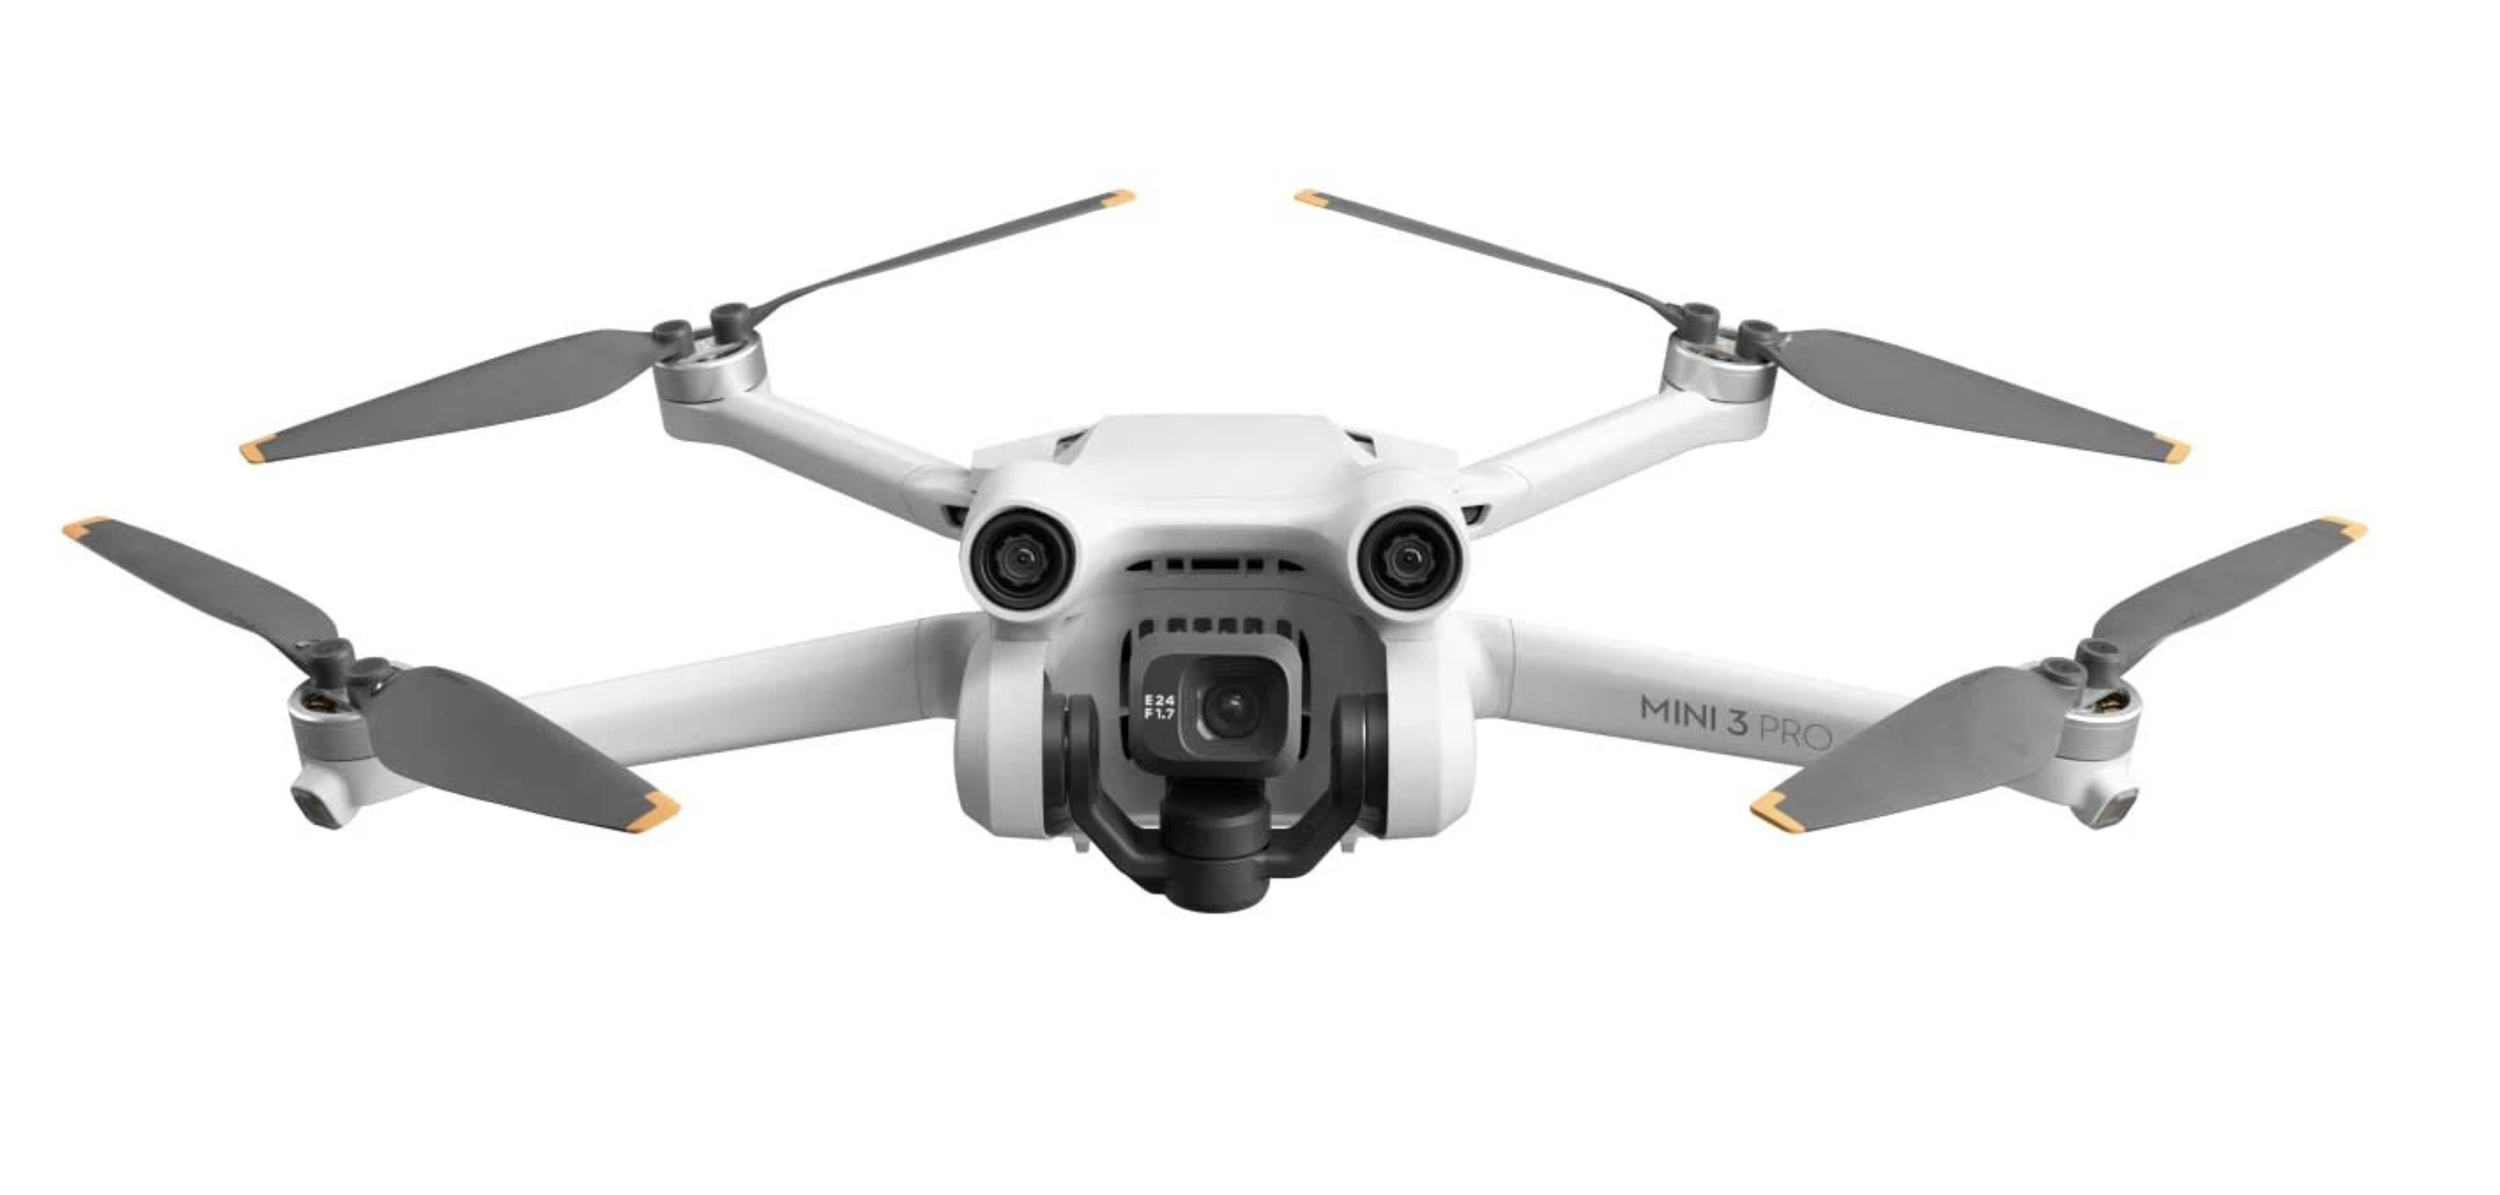
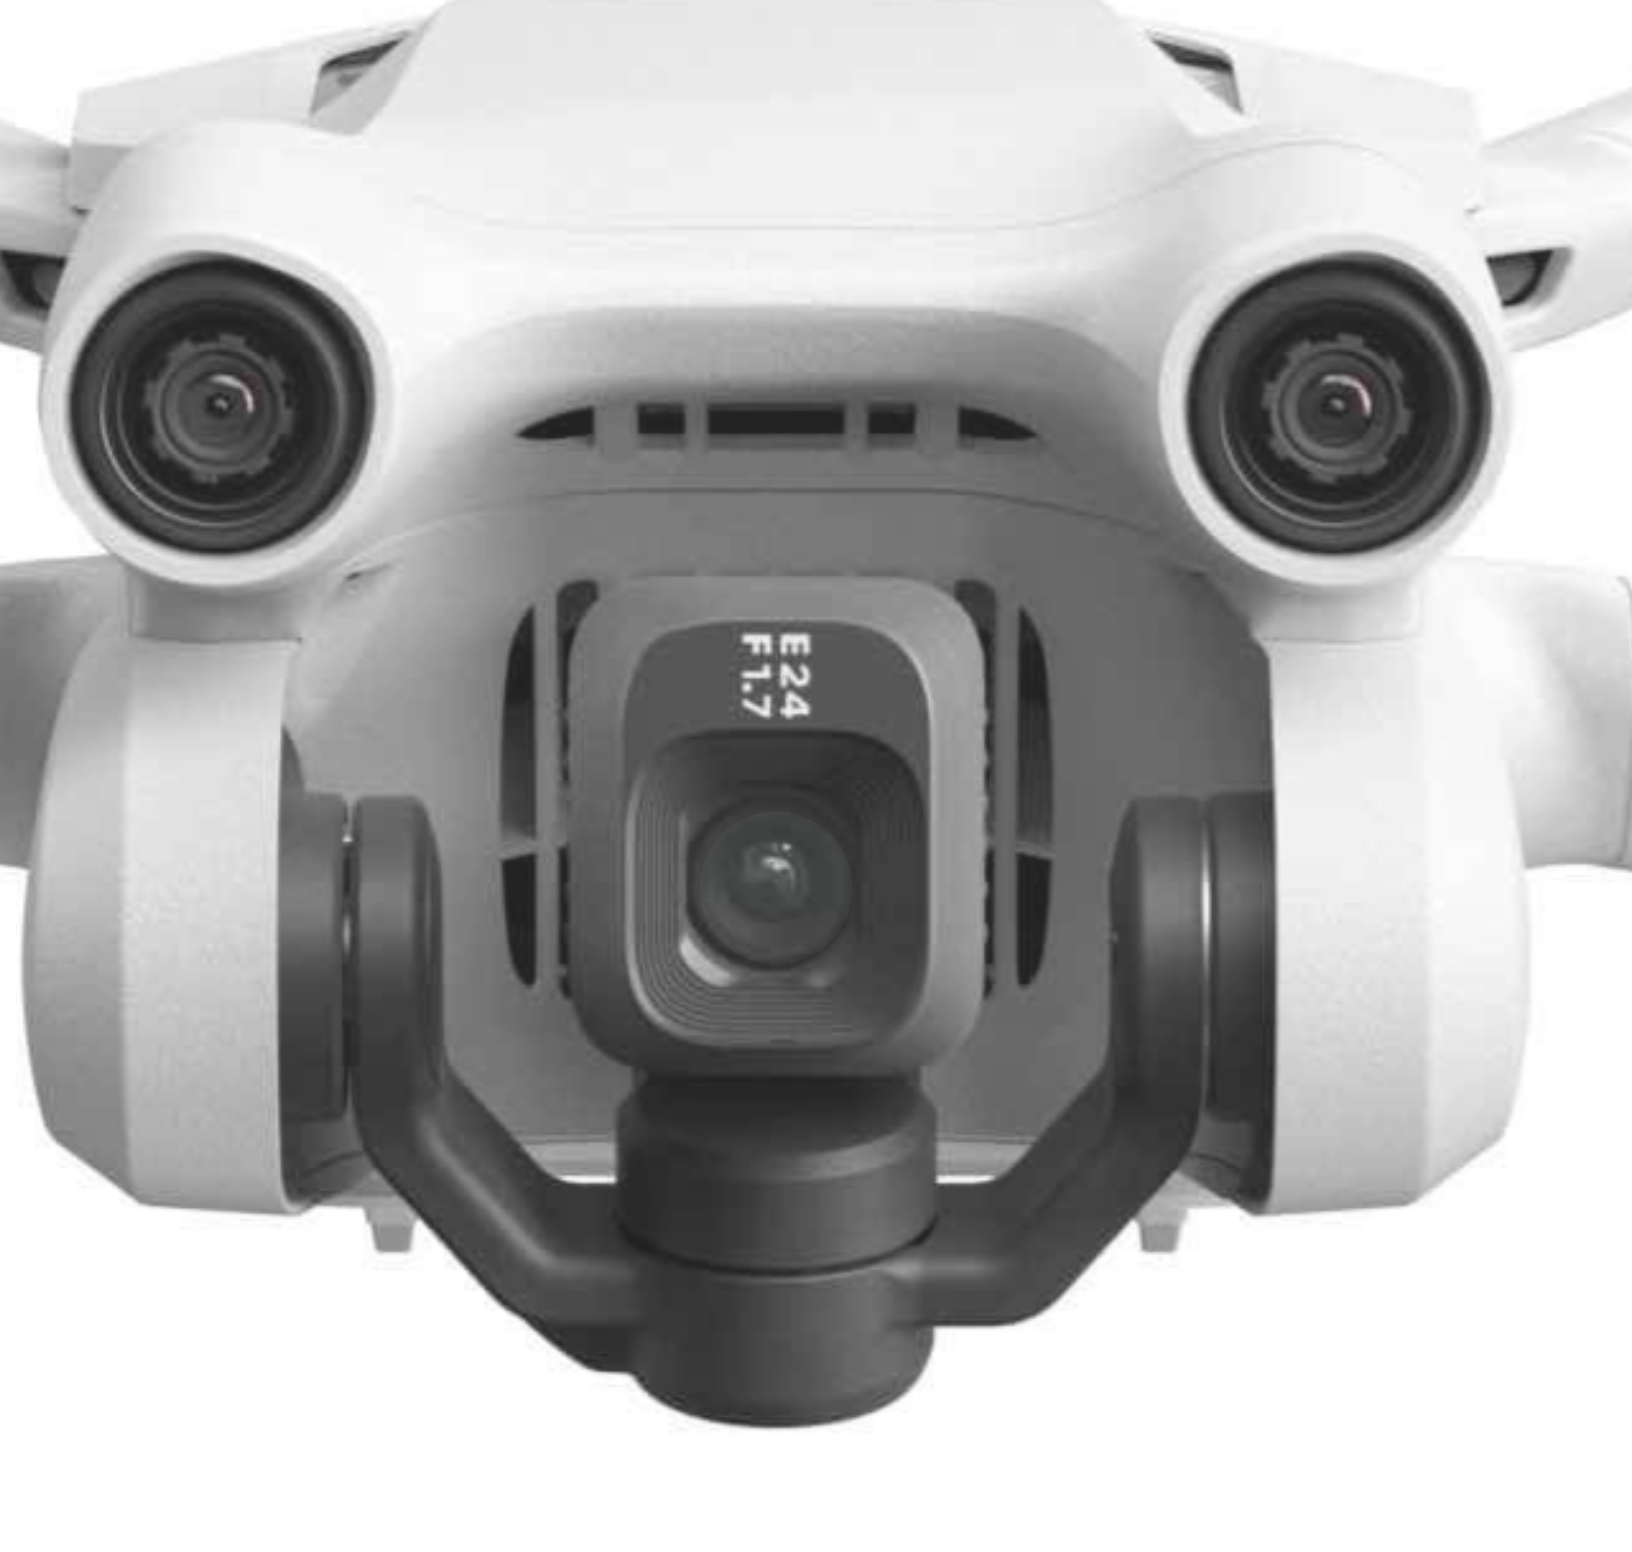
The new Mavic mini 3 pro
My Pick for most of you - the NEW Mavic Mini 3 Pro!
Most of your are looking for a reasonably priced drone with features that you won’t outgrow soon. The new Mavic Mini 3 Pro offers 4k 60p video, 48mp stills, obstacle avoidance and active tracking (the drone will follow you), and a 34-minute flight time. $759 for Drone, 1 battery and standard remote. This is more expensive than previous mini drones but it is a much more capable drone and replaces the Air 2S as my recommendation for the best drone for you.
Love it or hate it the new mini 3 pro can shoot vertical video for all your reel and tiktok needs….
Pros of the Mini 3 Pro - Small(easily packable) and Lightweight(doesn’t require registration), Obstacle avoidance can be helpful, active track makes the drone more versatile especially if you are alone and need to be filmed in action. Occusync 3.0 for 7-mile+ connectivity range! High enough video and photo quality that most users will be happy.
Cons of the Mini 3 Pro - More expensive than previous versions of the Mini drone, Limited obstacle avoidance - no side protection, larger battery available for purchase does put drone over 250g limit requiring registration.
The Mini 3 pro is currently sold in 3 packages
Drone only $669.00 [Buy at B&H Photo]
DJI Mini 3 Pro with RC-N1 Remote $759 [Buy at B&H Photo]
Drone with new DJI RC Remote $909 [Buy at B&H Photo]
The standard Battery (2453 mAh) Provides 34 minute flight time
The Intelligent Flight Battery Plus (3850 mAh) Provides 47-minute flight time! It will only be sold in select countries and no pricing is available at this time. Both batteries will charge via USB-C.
The Mini 3 Pro will work with existing remotes you may own from the Mini 2, Air 2, or Air2s making the Drone-only bundle a smart way to upgrade for existing owners of one of the recently mentioned drones.
The new DJI RC remote is a more affordable version of their pro remote - My original review video of the pro remote.
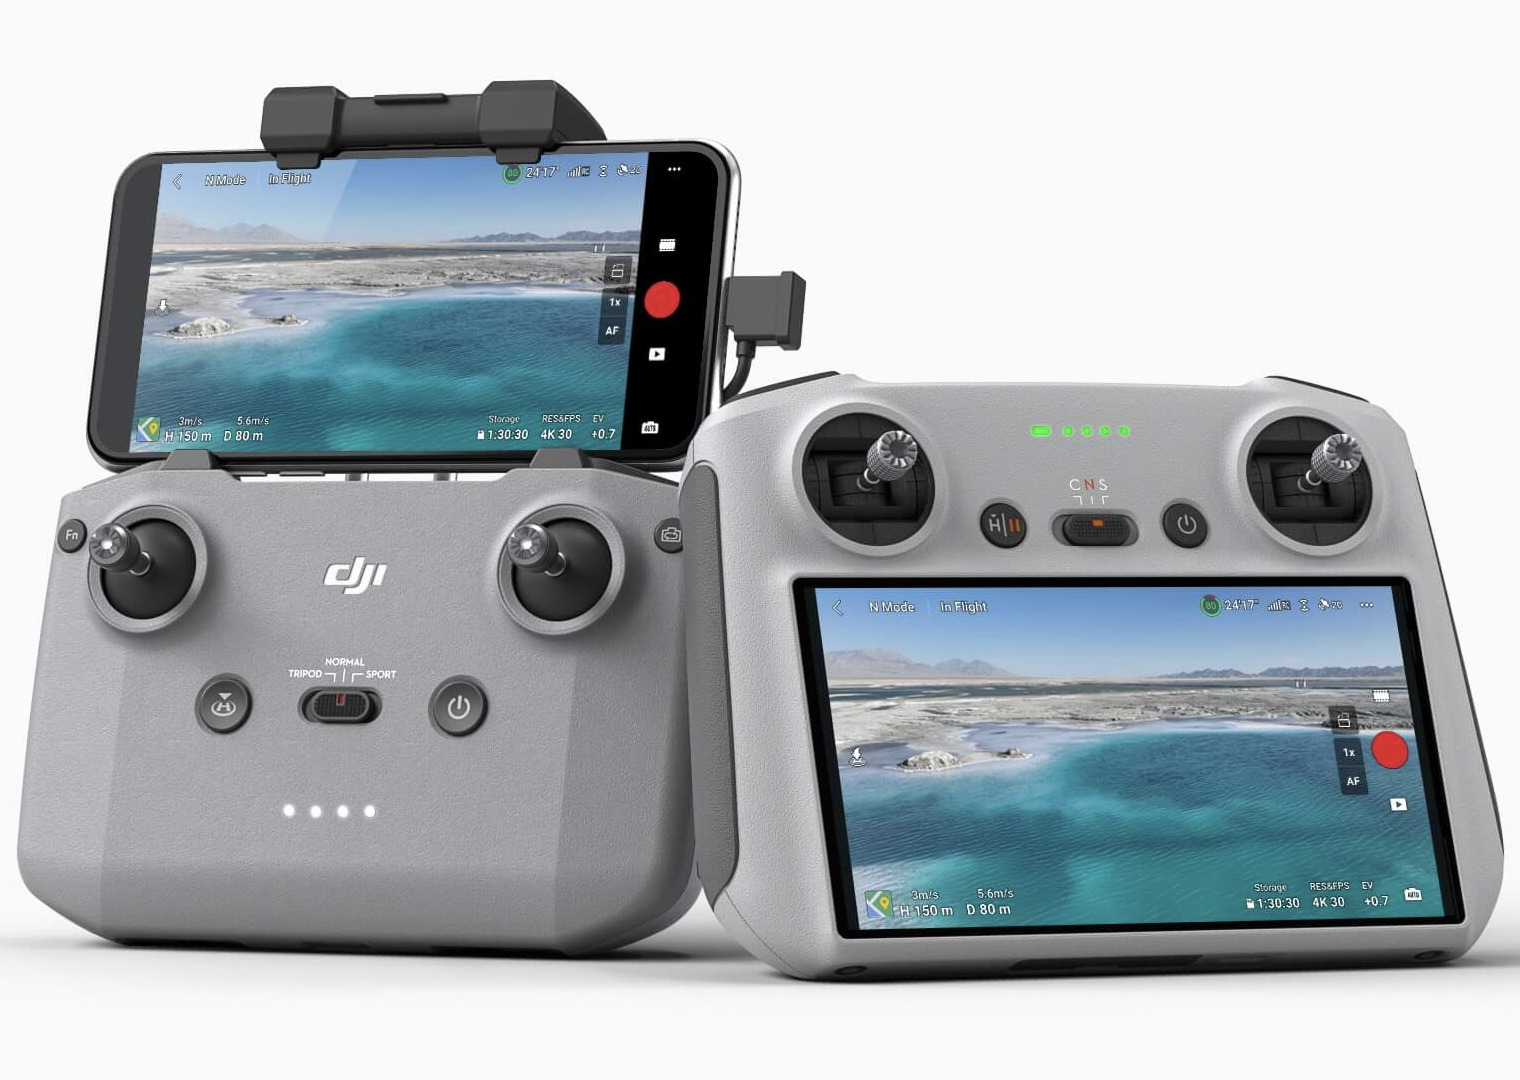
Standard Mini 3 Pro remote on the left (you supply your phone) NEW DJI RC Remote on the right with 700 nits of brightness
Looking for a more budget-friendly drone -
DJI Mini 2 Fly More Combo - The best budget drone with 4k and Raw photo capture. No obstacle avoidance or active tracking. Currently $449 at B&H Photo.
DJI Mavic Mini Fly More Combo - The original Mini only shoots at 2.7k mac resolution, doesn’t have obstacle avoidance or active tracking, and is missing Occusync which makes a real difference in the range(distance from you to drone) that you can get a clear video feed and have control over the drone. Most noticeable in denser areas but is still a decent value and a good beginner drone $399 at B&H Photo
Looking for a more professional level drone for work -
Mavic 3 Fly More - POWERFUL - more than most of us need but starting at $2,000 it’s the cheapest way to get such a large sensor for excellent quality photos and video. Correction to video - the firmware update is already out to provide the active track and additional modes.
Just looking for Fun -
DJI FPV - Pretend to be a jet fighter pilot! So much fun flying.
EZ MAX FPV Drone - a VERY affordable way to try FPV flying
DJI Tello - a VERY affordable way to experience the easy flying of DJI drones.
Accessories -
Landing Pad for Drones (29.5") Keeps your drone cleaner when take off and landing
Freewell Circular Polarizer CPL Filter for DJI Air 2S
Multi Charger - Charge multiple batteries simultaneous. DJI multi charger only charges 1 at a time.
USB Charger for Air2s - Charge more easily on the go
MavMount iPad holder - Upgrade your photo/video capture experience
Apps - B4UFly & AirData UAV
https://airdata.com/ SAVE 20% with code PHOTOREC20
Buy Link for Tamron 18-300 - https://bhpho.to/3kICNmk
Primes to add for a complete kit -
For Stars
Sigma 16mm f/1.4 https://bhpho.to/3lgTaqy
Fuji 18mm f/1.4 https://bhpho.to/3D2wzDV
For Portraits -
Sony 35mm f/1.8 https://bhpho.to/3E68GNk
Several excellent Fuji Options https://bhpho.to/3FWb0a1
The Tamron 18-300mm f/3.5-6.3 Di III-A VC VXD Lens Sample Photos

100% Free Workshop - Join me LIVE on Wednesday, Dec 1st 2021 at 6 pm PST (2 am GMT)
Read More