Travel & Learn with me in 2023 and Beyond

I teach on workshops with McKay Photography Academy and I lead my own workshops. You can see a complete list of tours they offer at this link - http://mckaylive.com/product-category/tours/

I will soon announce a Death Valley NP and Alabama Hills workshop - This will be in early December of 2023. Add your info below to be notified first and if you would like to add your name to the list for the late August 2024 Alaska Bears workshop you can click here. Feel free to reach out if you have any workshop questions.

Death Valley Sand Dunes

Would you like to be notified when I launch the Death Valley & Alabama Hills workshop?

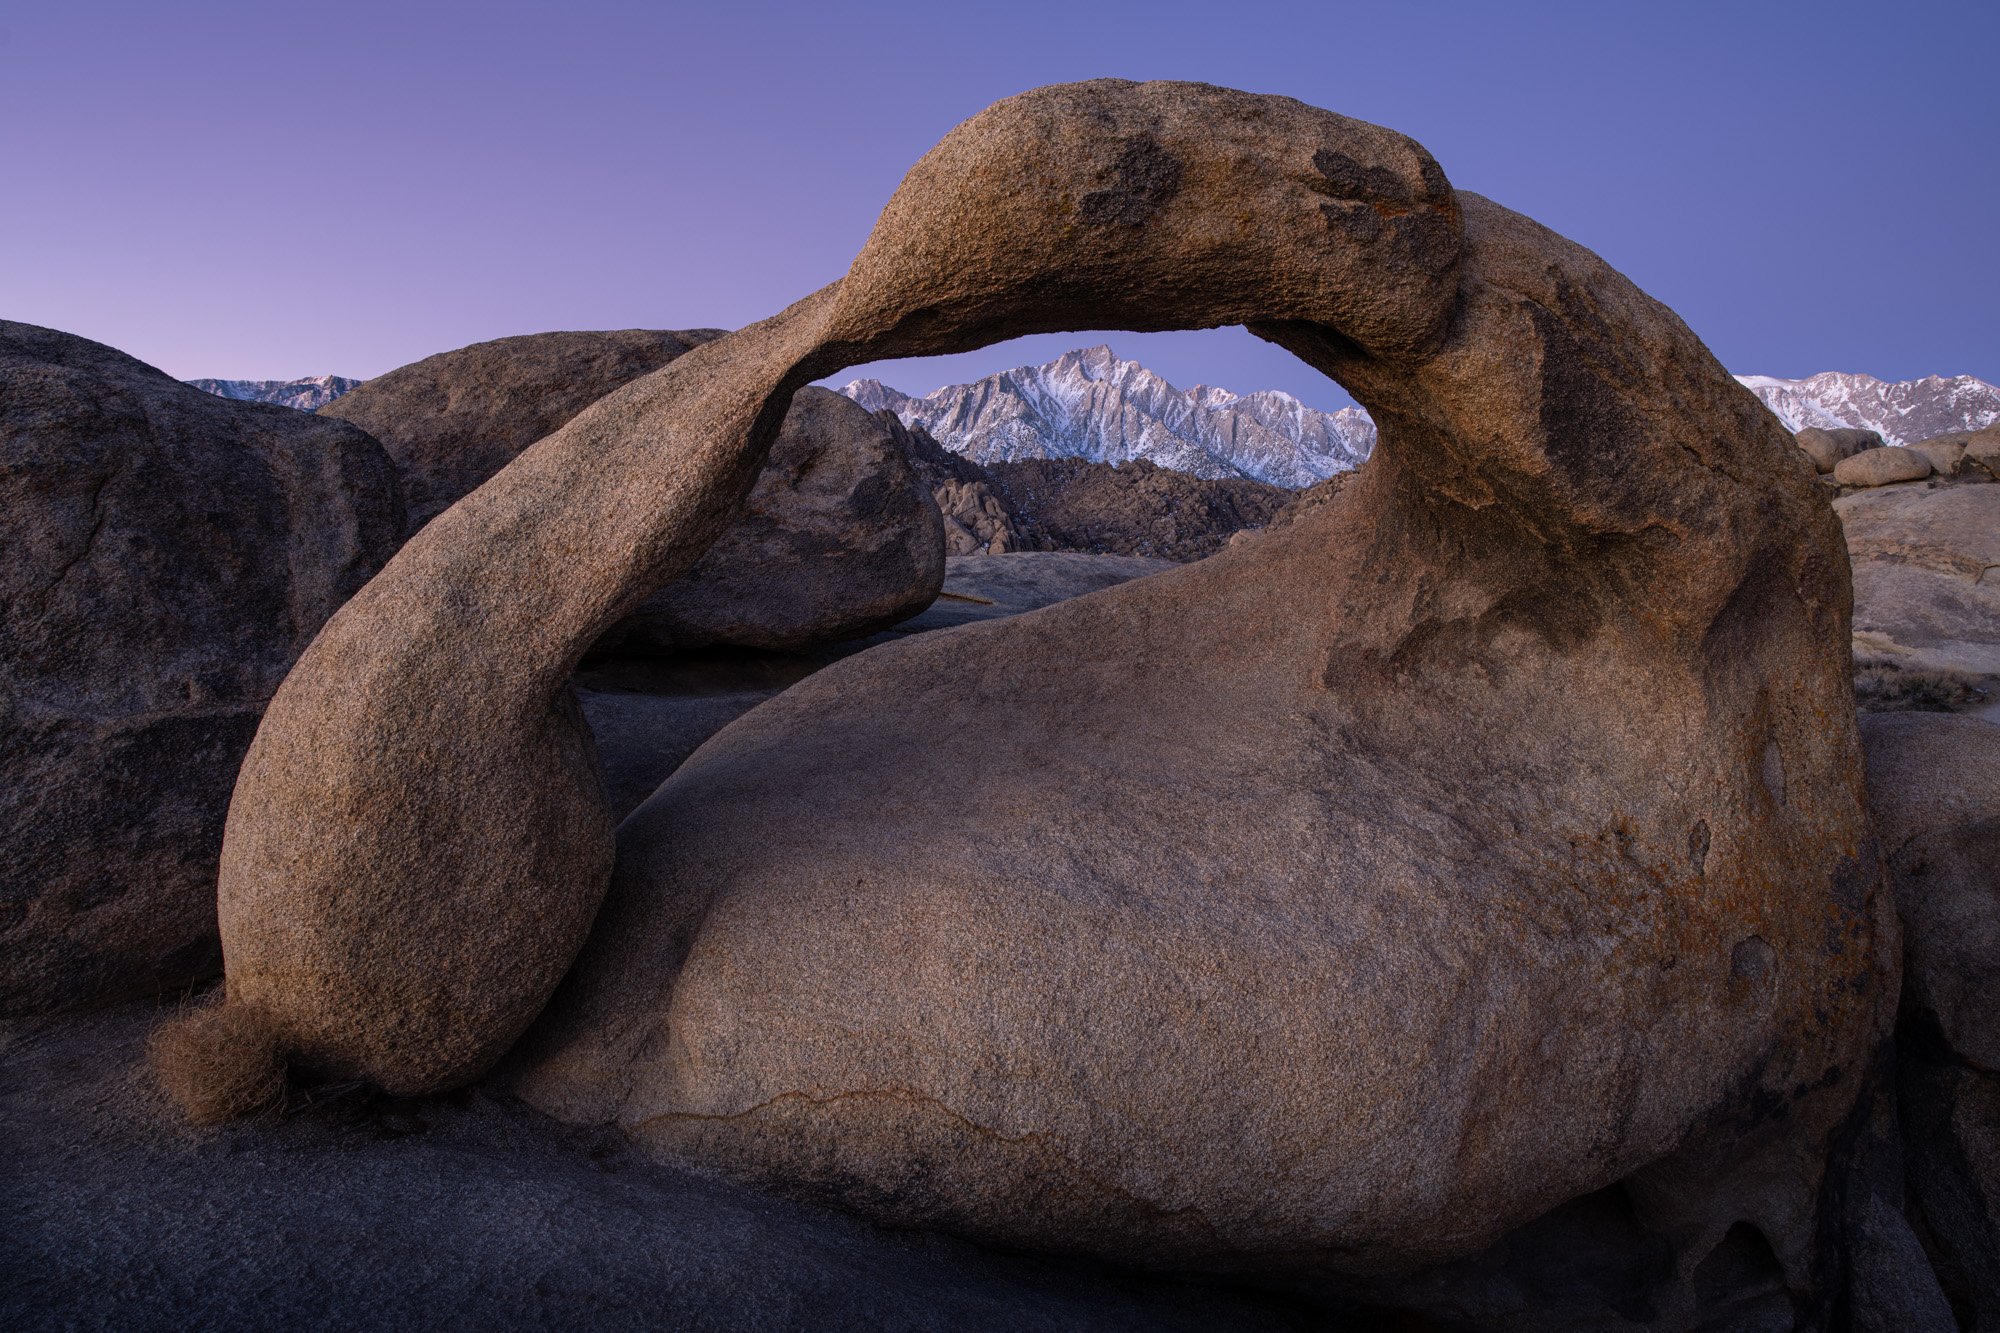
Alabama Hills - Mobius Arch

Mesquite Sand dunes - Death Valley NP

Drone Buying Guide - Updated Dec 2022

My drone guide and recommendations for the holidays

Cheapest - Ryze Tech Tello
Best Beginner - DJI Mavic Mini 2 ( leaving on the list but the new Mini 3 is better)
Best Beginner - DJI Mini 3
Most Versatile - DJI Mini 3 Pro
Pro Level - DJI Mavic 3 Classic
FUN! - DJI FPV Avata (New Video - FPV Avata vs Mini 3 Pro)

DJI Mavic Mini 2

  • Budget Pick - DJI Mavic Mini 2 $449 - Harder to find now that it is being replaced by Mini 3

    • 4k video with 3-axis stabilization (so smooth)

    • JPG or 12 MP RAW photos

    • Occusync 2.0 for 6-mile connectivity

    • 31 minute flight time

    • Quick Shots - Preprogrammed flights for easy and slick video shots

    • Less than 250g no FAA Registration required

    • Missing Obstacle Avoidance and Tracking Features

This is a great beginner drone at an affordable price. It is possible you will outgrow if you get serious about drone flying because it is missing tracking options but an overall impressive drone for its size and weight that provides good quality video and good photos.

Buy on B&H Photo | Buy on Amazon


DJI Mini 3 (newest) -

Better than the Mini 2, Missing a handful of Mini 3 Pro features - Drone & Remote - $559 on B&H Photo

  • A better low-light camera (vs the Mini 2)

  • A new gimbal system for better stability in wind and vertical shooting like the mini 3 pro

  • Much better battery life (vs the Mini 2)

But this drone is missing a handful of features found in the Mini 3 Pro. I have highlighted a few below that I think for those not on a tight budget the Mini 3 pro would be the better drone and a drone you are much less likely to outgrow soon.

  • No obstacle avoidance sensors

  • No 48MP photo mode (still has 12MP photo mode)

  • Video limited to 8-but H.264 with 4k 30 fps max (mini 3 pro offers 4k at 60fps)

  • No MasterShots - automated series of quick shots for easy b-roll

  • No ActiveTrack, Timelapse or HyperLapse modes and missing Asteroid Quick shot

  • Live view resolution just 720p. (mini 3 pro offers 1080p)


DJI Mini 3 Pro

  • The Drone that will suit 90% of us - DJI Mini 3 Pro $759

    • 4k video horizontal or vertical orientation with 3-axis stabilization (so smooth)

    • JPG or 48MP RAW photos

    • Occusync 3.0 for 7.5-mile connectivity & better connectivity in urban landscapes

    • 34-minute flight time (47 min with Plus battery)

    • Quick Shots - Preprogrammed flights for cool footage

    • Less than 250g no FAA Registration required

    • Forward and Backward obstacle Avoidance for safer flying

    • Tracking Features auto-follow selected subjects - great for solo filming and automatic flying.

This newer Mini drone from DJI is incredibly impressive. Similar in size and weight to the mini 2 but it does provide obstacle avoidance and tracking allowing you to assign a subject that the drone will automatically follow and film. This is also DJIs first drone to offer true vertical resolution and offers obstacle avoidance for more peace of mind when flying - meaning you are less likely to crash into something. This is a drone that you are not likely to outgrow soon unless you start flying professionally.

Buy on B&H Photo | Buy on Amazon


The DJI Mavic 3 Classic

  • Best Quality Photos & Video - DJI Mavic 3 Classic $1749 (NEW)

    • 5.1k video horizontal with 3-axis stabilization (so smooth)

    • JPG or 20MP RAW photos from huge 4/3rd sensor (excellent in lower light)

    • Aperture Control

    • Occusync 3.0 for 7.5-mile connectivity & better connectivity in urban landscapes

    • 46 minute flight time!

    • Fastest top speed and better handling in WINDY conditions.

    • Quick Shots - Preprogrammed flights for cool footage

    • More than 250g (895g) FAA Registration requried

    • Omnidirectional binocular vision system obstacle Avoidance for much safer flying

    • Tracking Features auto-follow selected subjects - great for solo filming and automatic flying and Hyperlapse

The latest version of the Mavic 3 is this classic which provides a HUGE sensor- Micro 4/3rd that will provide incredible quality photos and video plus you get aperture control which is nice to mostly help keep shutter speeds reasonable for filming. The mini 2 and mini 3 above have sensors that are similar to good smart phones and this Mavic 3 Classic has a sensor closer in size to a real camera :) - It makes a noticeable difference. Pair those features with incredible flight times, wind resistance and range and you have a serious drone. The downside it comes with a. more serious price and is noticeably larger and heavier. This drone does have the best obstacle avoidance and tracking brain making it less likely you will crash and making it more likely that it will stay on target with tracking.

Buy on B&H Photo | Buy on Amazon


The DJI FPV Avata

  • The Fun to Fly Drone - DJI FPV Avata $1,168

    • 4k video horizontal single-axis stabilization with electronic roll stabilization

    • JPG 48MP small sensor

    • Occusync 3.0 for 6-mile connectivity & better connectivity in urban landscapes

    • 18 minute flight time

    • Downward sensors only - no obstacle avoidance

    • Flown while wearing goggles

    • Flying is FUN and very dynamic

    • No preprogrammed Quick Shots - you fly

    • No tracking features

    • More than 250g FAA Registration requried

This drone is unlike any of the others on the list - the Mini 2 and 3 and Classic should be considered flying camera/video platforms, you put those drones into the air for the purpose of capturing photos and stable video. The DJI FPV Avata you put into the air for FUN! And, you can capture photos and video but it is much more about creating dynamic video footage - flying in and around stuff. This one will take the most practice to create cool footage especially since it does not offer any built-in quick shots or tracking capabilities but the footage it creates is very dynamic and currently quite popular.. it is also really fun to fly as you wear googles and have a first-person view. It is also the only drone that I feel comfortable flying in and around people (willing people) because it has prop guards. It is also built to withstand more than a few crashes which with the speed and lack of obstacle avoidance is a good thing. Watch my video for more info.

Buy from B&H Photo | Buy from Amazon

The Other DJI FPV drone - the one that is just called DJI FPV is nicely discounted now but because of its size and larger props without sturdy prop guards, I don’t typically recommend it unless you are only looking for something fun to fly. It’s larger size and intimidating props mean you are going to keep it away from people, buildings and objects and that is really what FPV flying is all about. Learn more on Amazon.

Finally - the most affordable drone I can recommend is the Ryze Tello - this is mostly an indoor drone but it is actually easy to fly, can record decent video and photos and costs just $149. Ryze Tello on B&H Photo. If you would like a more capable drone for just a little more the older DJI Mini SE for $329 is a good place to start.

Lightroom and Photoshop in-person classes - Where next?

Where would you like to see a future in person Lightroom and Photoshop Class? Check the box. If you want to be notified add your info (optional)

Lightroom and Photoshop Class - Join Me!

SOLD OUT! - Where else would you like to see an in-person class held? Fill out this quick survey.

A return to in-person teaching! - Join me for this small class that will provide you with the hands-on instruction you need to get your photos organized and edit efficiently.

January 14 & 15, 2023 in Gold River/Rancho Cordova, CA

Sacramento Lightroom & Photoshop Class
$399.00

Learn my complete photography editing workflow using Lightroom Classic and Photoshop in a hands-on and personalized environment.

Designed to get you from your current comfort level with Lightroom and Photoshop to a whole new level with personalized instruction. I am a photographer and I have been working with Lightroom for 15 years and created The Lightroom for Beginners video series that has helped photographers all over the world learn and improve their skills in Lightroom and Photoshop.

No matter what your level is with Lightroom & Photoshop, you will learn what you need to beautifully and efficiently edit during this immersive learning course! Instruction at the McKay’s comfortable Classroom and Gallery location outside Sacramento, CA. This is HANDS-ON learning. You are encouraged to bring your computer and you will have time to apply and practice the techniques discussed in class.

If you are new to Lightroom or Photoshop, there is no need to be intimidated, I have experience teaching students of all levels.

Due to the small-group nature of this class, it will sell out fast. Do not delay in registering to be a part of something super special at a truly affordable price!

See the details below as well as the FAQ page!

Add To Cart

Lightroom Topics Covered:

  • Understanding Lightroom

  • Installation and Catalog Setup

  • Best Practices for Importing your Photos

  • Staying Organized

  • Understanding Collections

  • Deep Dive into the Develop Module of Lightroom and Photoshop

  • Editing, including the use of presets, masks, and brush tools

  • Creating HDR and Panoramas

  • Best Settings for Exporting for Print, The Web, and Instagram/Facebook

  • Round Trip Editing with Photoshop

Photoshop Topics Covered

  • Layers & Masks Explained Simply

  • Editing in Camera Raw

  • Healing and Content-Aware Fill

  • Sharpening & Blur

  • Making Photoshop work for you

Dates:

  • January 14 & 15, 2023

  • Workshop is from 10am to 5pm on Saturday and 9am to 4pm on Sunday

  • Time will be taken for a lunch break each day.

Price:

  • $399

Location:

  • Gold River/Rancho Cordova, CA

Airport:

  • Sacramento (SMF) is the closest airport to the course location.

Lodging:

  • Lodging is not included in the course price. There are several hotels in the area. A list of recommended properties will be sent out after registration. We will assist with finding roommates for those who request it.

Does Not Include:

  • Lodging, Transportation or Travelers Insurance (Recommended)

  • Personal expenses such as meals or beverages

  • Computer or software costs

Q: What if I am new to editing?
A: This course is designed to teach you even if you have never opened Lightroom or Photoshop. You’ll learn an incredible amount in just two days!

Q: Do I need to own Lightroom and Photoshop
A: NO, Adobe offers a free 7-day trial of these programs. This course is designed to get you started from scratch - no prior experience with Lightroom or Photoshop is required.

Q: What if I own a different version of Lightroom?
A: There are several versions of Lightroom. Lightroom CC, Lightroom Classic and older Lightroom 6.  90% of what will be taught in this class applies to ALL the older versions of Lightroom Classic. If you have Lightroom CC you may find much of the first day frustrating as the organization tools are quite different.

I teach you how to edit most photos in just a few easy steps. This quick portrait of my son was completed in 15 seconds! I show you how to use Lightroom’s tools to quickly get the results you want without spending hours editing.

Can’t make this class? Where would you like to see me hold in person classes next? Fill out this 30 second form. Thanks!

2022 Holiday Deals - Black Friday / Cyber Monday Photo Deals for 2022

Deals -

UPDATED 11/28 11:30am

NEW Cyber Monday Deals

DJI Mini 2 Drone Fly More Combo $90 off (Today Only) - This is my budget pick for a starter drone and $90 off is sweet! My Review | My Complete Drone Buying Guide with a drone starting at $149!

The FAST 2TB SSD at B&H is $10 cheaper than Black Friday - This is the drive that I have used every day for the last year and am very happy with its performance(Soooo fast) and reliability. If you don’t need the pro-level speed and are just looking for the benefits of an SSD - This SanDisk SSD is on sale for just $119 for 2TB. The speed of this drive is 520 MB/s. The pro drive provides 2000 MB/s. Honestly, in many day-to-day tasks you will not likely notice this difference. Larger imports, copying, and video editing is where the faster drive does help. Amazon Link for FAST drive.

FAST 128GB SD Card - I have had a handful of these cards for a little more than a year and I am very happy with the speed and reliability. If you don’t have a camera that is going to make use of those speeds these Lexar cards are excellent and nicely discounted today.

See additional B&H Cyber Monday Deals

Huge Selection of Samyang and Rokinon Lenses on Discount -

Canon users looking for the most budget friendly astrophotography lens - The 14mm f/2.8 is just $161

Sony E mount users the 35mm f/2.8 is a tiny lens that is fun for walk around photography - 35mm f/2.8 Just $179

Fuji X-Mount users the 12mm f/2.0 which is my favorite budget astro lens is just $211 Today

Many more budget-friendly options.


Non-Photo Deals -

Replace your bulky Apple Laptop Charger - The Anker USB C Charger, Anker 735 Charger GaNPrime 65W, PPS 3-Port Fast Compact Foldable Wall Charger is on sale today for just $41. Powerful enough to charge your MacBook and additional devices. Anker USB C Charger

My favorite headphones for running are 30% off today. AfterShokz! The name and the spelling of the name isn’t great but these have been my running headphones for the last 3 years and they are still going strong. So lightweight that I can’t feel them when they are on, they stay put and I can still hear what is going on around my which feels safe. AfterShokz Aeropex.


Many of the deals below are still live!


Looking to add an external flash? Rare Godox sale on B&H - The V1 is a fantastic flash - Just $159

B&H has a $50 discount on an excellent color-accurate monitor - the Dell S2722DC 27” 4k

M1 Macbooks with BIG discounts. My main machine is a 14” MacBook M1 with 32GB Ram and it is fantastic for Lightroom and Photoshop and even 8k video editing!

APC UPS - so often overlooked as part of the backup/computer protection system. You need to provide these important hard drives a clean uninterruptible power and this system is perfect and on sale. APC UPS 1500VA

The Sony Trade-in deal with bonus makes it a great time to upgrade

WD Black Friday deals. Pictured above are just a few of the drives on sale. Here are a few of the deals I think you should consider.

  • The FAST 2TB SSD PRO at its lowest price of all time - This is the drive I use as my main working drive.

  • If you don’t need the speed of the pro listed above - i.e. no video editing, or hobbyist editor the slower SanDisk is very affordable and still provides speed benefits over a traditional spinning drive and saves battery, and is more travel friendly. SanDisk 2TB SSD

  • 128GB SD Card for just $24

  • Huge drive to backup everything!! 16TB WD for just $239

Everything Peak Design Offers is 15% off - I love their minimal arca swiss plates and they make the best straps.

Zenfolio - Buy now and get 9 months free!

Squarespace - the best website builder and online platform. 10% discount using my link.

B&H has Synology NAS systems on sale - Great way to share files in home or small business.

GoPro Hero 11 is $100 off! Rare discount on the latest GoPro model

$100 Credit on Google Pixel 6a, Pixel 7 or Pixel 7 Pro phones. On top of holiday discounts.

Reliable Carbon Fiber Tripod by Benro - Just $99 for the next 5 hours on B&H Photo

Last year’s M1 Macbook Air for $799 - This is a fantastic travel machine and powerful enough for basic lightroom and photoshop editing.


Great stocking stuffer and fun present - the Instax Mini Camera that produces a real print is on sale for just $69.95

If you like this idea but want to just get the printer - that is also on sale for $85. This is a great gift for the traveler as it lets you share prints - we use on our workshops to provide locals with photos, they are always appreciated.

MORE Great Deals Below

ThinkTank Sales on their excellent gear organizers and bags. Up to 25% off!! ThinkTank Sales

Fstop Gear - Save 20% with code Packweek22

I have a $100 Google Store Credit for YOU! All the details.

Music for Videos - I use and LOVE Epidemic Sound - Starting tomorrow, Nov 25 Sign up using my link for a 30-day free trial and 2 months with 75% off.

We are all fans of Backblaze as the best online backup system and they are offering a rare 20% off with code BLAZEON22 - Use This Link

Holiday BayPhoto Print Lab Specials and a NEW Product

Topaz Labs - HUGE SALE $300 Off. If you already own one or more of the products this is a great time to extend your upgrade period. See the bundles and the sales.

Apple Airtags - 4 pack. 20% OFF! We strongly recommend these for all checked luggage and camera bags. On trips during the summer and fall of 2022 they sometimes made the difference between recovering luggage or hearing from the airline that they have no idea where your bags are.


Spider Holster Promo: 30-50% OFF Site Wide


Fuji X-T5 - 40MP, 4k 120fps, 7-stop IBIS, Same Body Fuji Shooters Love!

Tthis camera was announced as I was writing this newsletter so I will just share the specs and say - 40MP with a very good focusing system, lighter than the original X-T1, and priced at $1699. This paired with the fact that Fuji offers a great ecosystem of lenses makes this a very compelling camera. Preorder today - shipping starts Nov 17th

Fuji X-T5 Specs

  • 40MP APS-C X-Trans CMOS 5 HR BSI Sensor

  • 4K 120p, 6.2K 30p, FHD 240p 10-Bit Video

  • 7-Stop In-Body Image Stabilization

  • 425-Point Intelligent Hybrid AF System

  • 3.69m-Dot OLED Electronic Viewfinder

  • 3" 1.84m-Dot Tilting Touchscreen LCD

  • 20 fps E. Shutter, 15 fps Mech. Shutter

  • 160MP Pixel Shift Multi-Shot

  • Bluetooth and Wi-Fi Connectivity

  • ProRes & Blackmagic RAW via HDMI

Google Store - $100 Credit!!

UPDATE Feb 08, 2024 - NEW promo - Buy A pixel Phone and receive $50 store credit.

Purchase the Pixel 8 Pro, Pixel 8, or Pixel 7a and receive a $50 store credit to buy something like the Pixel Buds or a Nest!

Use code: 29E3ZPIEAXZ2Q0KYGQAUIU8 at checkout. I have a limited number of codes to provide


Use Link: https://store.google.com/category/phones

More Info -

Valid through 6/30/2023.

Click this link to redeem your offer: https://store.google.com/category/phones

*Refer a friend to purchase Pixel 7a, 8 or 8 Pro from Google Store using the single use, Referral code provided in this email, and both you (i.e. Code giver) and your friend who uses the code (i.e. Code user) will get a $50 Promotional code later by email. Limit 1 Referral code per Code giver and 1 Code user per Referral code. Code giver and Code user will receive an email with the Promotional code within 4 weeks after Code user's Pixel 7a, 8 or 8 Pro is shipped. Referral code must be used for purchase by June 30, 2024 or it will expire. To redeem the Referral code, the Code user should visit store.google.com, sign-in with their Google account credentials, add a Pixel 7a, 8 or 8 Pro to their cart, and enter the Referral code as a promo code during checkout.

Referral code is provided by Google LLC for use on Google Store only, and is subject to the following terms: (i) available only to United States residents with shipping addresses in the 50 states; (ii) Code giver must be opted in for Google Store marketing emails to receive the Referral code; (iii) Code user must be age 18 or older; (iv) Code user must have internet access and must have or add a valid form of payment at checkout (v) Referral code cannot be used with Guest Checkout, so the Code user must have US Google Pay profile and be signed-in to their Google account to be eligible to receive the $50 Promotional code; (vi) Referral code must be redeemed online on Google Store and is ineligible for buy online and pick-up in store (BOPIS) purchases and physical in-store purchases; and (vii) Referral code must be redeemed only for purchase of an unlocked or Google Fi version of the Pixel 7a, 8 or 8 Pro as allowed by applicable laws. Referral code may be combined with other offers. See additional Google Store Promotion Terms for more information (https://store.google.com/terms/google_store_promo_codes).

Code giver and Code user will each receive an email with a Promotional code for $50 US Dollars within 4 weeks after Code user’s order is shipped. The Promotional code can only be used on the US Google Store. Promotional code isn't valid if the eligible device (or any part of the order) is returned. Promotional Code is non‑transferable, and not valid for cash or a cash equivalent. Shipping charges may apply at checkout. Void where prohibited.

To redeem your Promotional code, visit store.google.com, add the desired device to your cart, enter the Promotional code during checkout to receive a $50 discount for purchase of any device on Google Store. $50 discount will be applied at checkout. Promotional code must be redeemed by September 30, 2024 or it will expire. Promotional code may be redeemed only on the online Google Store for eligible items as allowed by applicable laws. See additional Google Store Promotion Terms for more information (https://store.google.com/terms/google_store_promo_codes).

Canon R6 Mark II - 24MP, 40FPS, 8-stop IBIS, Updated AF

The Canon R6 II was announced yesterday- on the outside the camera is very similar to the R6, Which I reviewed and found to be excellent. The only real differences between the two can be found on top with some switch and dial rearrangement. On the inside, we have a new Canon-designed 24MP sensor and a host of additional updates that add up to an improved camera. It’s available for preorder and will be shipping later this month for $2499 body only. The same price that the R6 launched.

New Features of the Canon R6 II

  • 24.2MP CMOS sensor (Not the R3 sensor)

  • 12 fps mechanical shutter (40 fps electronic shutter at 12-bit)

  • Improved Machine Learning AF System

  • Stabilized Sensor (IBIS) rated to 8.0 stops

  • 4K/60p video w/ no crop and 1080/180p up from 120p in R6

  • Raw burst mode with pre-capture

  • Moving subject HDR mode (JPEG only)

The bump from 20mp in the R6 to 24MP in the R6II is nice but it is not the stacked and backside illuminated sensor used in the R3 - so this isn’t a mini version of the R3 but even when I tested the silent shutter used in the original R6 I found it fast enough to use with all but the fastest action with no sign of rolling shutter and the R6 II seems to have improved those capabilities even with the increase to 24MP.

More About Sensor Types -

Back Side Illuminated (BSI) Sensor - A redesigned sensor that generally provides better low-light capabilities

Stacked Sensor - A redesigned sensor that provides a much faster readout allowing for an electronic shutter for all action. Currently found in the Canon R3, Sony a1, and Nikon Z9.

The sensor isn’t shared with the R3 but some of the autofocus technologies from that impressive camera were included for improved subject tracking. The R6 only offered people and animals as subject tracking options - the new camera adds vehicles which includes cars, motorcycles, aircraft, and trains. Animal tracking has been updated to include horses - including zebras - our safari clients will be excited about this update. The biggest improvement with AF is an auto mode where the camera will determine the subject and use the appropriate AF mode. I will need to test this before recommending so stay tuned.

The 40fps is impressive (electronic shutter only) and they have included a pre-shooting feature. Turn it on and a 1/2 press of the shutter button triggers the camera to begin buffering shots. Fully press the shutter and it will capture a 1/2 second of those shots before you fully pressed the shutter and the camera will continue to capture shots until you release or the buffer fills which may not be a huge amount, again will need to wait for my full review to test.

Overall I see nice improvements to a camera that was already a solid offering. Launching at the same initial price this will replace the R6 in all of my recommendations for Canon full-frame mirrorless cameras. As of right now the R6 is still being sold for a $200 discount - Not much of a savings and no word on how long this camera will continue to sell.

Should owners of the R6 consider upgrading? I don’t see big enough improvements to endorse this upgrade - unless you see something on the list that fixes a real pain point for you keep you I recommend you keep the original and wait for the next version. Canon RP and R users would find this an excellent upgrade if you need or want the faster AF system and burst rates and stabilized sensor for photos and video. There were rumors of a R mark II this year - with this announcement I feel that is very unlikely and we may never see a R replacement.

Sony a7RV - 61MP, 10FPS, 8-stop IBIS, AI-Based Image Recognition with a newly designed articulating screen.

The new Sony a7R V - Keeps the 61MP Sensor, Gains AI AF system, New Screen Design & 8K Video!

Sony has made some real improvements to the megapixel beast that was the Sony a7R IV. The new features I am most excited about are the articulating screen that allows for tilting up or down while staying in line with the body AND it can flip out. It really seems the best of both worlds and is getting near-universal praise. And, Sony finally added focus bracketing and a bulb timer!! Something I talked about in the Canon $999 camera beats my $6500 Sony a1 video.

Here are the specs of the new Sony a7R v

  • 61MP Full-Frame Exmor R BSI CMOS Sensor

  • BIONZ XR & AI Processing Unit

  • AI-Based Real-Time Tracking AF System

  • 8K 24p, 4K 60p, FHD 120p 10-Bit Video

  • 4K 16-Bit Raw Output; S-Log3/S-Cinetone

  • 9.44m-Dot EVF with 120 fps Refresh Rate

  • 3.2" 4-Axis Multi-Angle Touchscreen LCD

  • 10 fps Shooting with AF/AE Tracking

  • 8-Stop 5-Axis Image Stabilization

  • Dual CFexpress Type A/SD Card Slots

You Can preorder the Sony a7R v now for $3,898.00 - Shipping in early December… my birthday is Dec 8th… just saying :) That price is an increase over the Sony a7R iv launch price of $3,499.

Pretty big improvements inside and out - the body is similar to the a7IV design with the addition of this new screen that allows for tilting while still in line with the body and can flip out and rotate for self-viewing- helpful for some video work.

The new screen that allows for tilting while still in line with the body and can flip out and rotate for self-viewing- helpful for some video work.

The megapixel count remains the same as the Sony a7R IV but Sony has added a new processor dedicated to AF Real-time recognition improving the accuracy and broader subject detection. Early results look promising with some impressive eye and subject tracking and even better results when the eye is hidden. Remember though that this is Sony’s resolution-focused camera and the sensor is not stacked so the electronic shutter is limited to still or slow-moving subjects and the FPS is 10 with AF. Still plenty fast but I don’t want anyone to think that this 61MP beast has suddenly become a speed demon. Though the addition of Dual CFexpress Type A/SD Card Slots means the buffer will clear much faster.

The 9.44m-Dot EVF with 120 fps Refresh Rate is one of the best at this price point and is gorgeous to use. The 8K video is impressive and overall this camera represents one of the very best hybrid systems (capable of shooting excellent photos and video) at this price point. And just in case you want to email and tell me that you don’t know anyone that owns an 8k television.. it’s not about publishing out at 8k, yet. It’s about having post-processing flexibility- just like the 61MP provides you can shoot 8k video and easily crop in to fill the frame with your subject or just to provide different shots from one clip.

Improvements to the pixel shift mean it can now handle some movement within the frame. I am getting mixed reviews here - some say it can be used handheld now while others say the difference is slight. I personally shoot a fair amount of pixel shift shots on my A1 for increased resolution and look forward to testing this myself.

And finally, we have a redesigned info screen and menu system that is an improvement over previous models.

Worth an upgrade from the A7R IV? I rarely encourage users to move from the previous model of any system to the next, the improvements are often slight but this is one of those rare cases where you might consider - the upgraded AF, the new screen design, and the 8K video features could add up for your use. Always feel free to reach out to me if you want someone to share my opinion on the value of upgrading or any new camera you might consider.

The Drone of My Dreams? DJI Announces an Affordable DJI Mavic 3 Classic

The new DJI Mavic 3 Classic

Around this time each year, I release my drone guide and recommendations for the holidays - here is a quick preview

I will be expanding on these recommendations in the coming weeks - feel free to bookmark this page.

Basically, most of us would be just fine with the Mini 3 pro- Obstacle avoidance, 34-minute flight time❈, obstacle tracking, and 4k video features with solid quality. This plus true vertical shooting for the increasingly popular format. The DJI Mini 3 Pro manages all of this packaged in a very travel-friendly and travel-feature-friendly body that doesn’t require FAA registration.
❈The flight time can be extended to 47 minutes with the plus battery but this does put it over the weight and requires a $5 FAA registration.

The DJI Mavic 3 Classic just announced Nov 2, 2022

Last year DJI Announced the DJI Mavic 3 - offering an awesome micro 4/3rds sensor AND a secondary sensor with zoom capabilities in one with a staggering 46-minute flight time. Pricing for this drone starts at $2049 and goes up to $4999 for the CINE version capable of recording RAW video directly to an internal SSD!

The new CLASSIC version of this drone drops the extra sensor with zoom capabilities and provides basically everything else at a reasonable price. They even offer a remote-free version allowing you to use one of your existing DJI remotes (not all are compatible) bringing the price down to just $1469

  • 20MP 5.1K Wide-Angle 4/3 CMOS Hasselblad

  • 4K Slow Motion at 120 fps

  • 10-Bit D-Log Color Profile & HNCS

  • f/2.8 to f/11 Adjustable Aperture

  • Omnidirectional Obstacle Avoidance

  • Up to 9.3-Mile HD Transmission Range

  • Advanced Return-to-Home Function

  • Automated Shooting Modes

  • Up to 46 Minutes of Flight Time

Honestly unless you are making money flying your drone the Mini 3 Pro is going to offer what you need and it does it in a much more travel friendly package.

Watch this space for updated content and reviews. Full reviews of the Avata and Mini 3 Pro coming soon.

I flew the DJI Mavic 3 Cine in Antarctica

I flew the DJI Mavic 3 (non-cine version) in Greenland

I flew the DJI Air 2S in the Arctic

The Air 2 S is no longer on my recommended list because the Mini 3 Pro can do everything the Air 2 S can do in a smaller, lighter and more portable package.

Essential Gear for Photography and Travel

A few weeks ago we had the idea to share with the PEN community the gear we always bring with us - besides the obvious camera and lenses here are my(Toby) essentials and a few extras that make travel a little more comfortable.

I'd love to know what is on your list - just leave a comment and let me know. I can share a community-generated list in the future.  If you would like to see more of the actual photo gear I use follow this link to my Gear Page.

The gear I find essential for photography and travel

The Gear

  1. Tenba Tools Cable Duo 4 - Amazon | B&H Photo

  2. Leofoto Tool - Amazon | B&H Photo (Novoflex Multitool on B&H Photo | Filter wrenches)

  3. L-bracket - Search B&H Photo

  4. Headlamp - Amazon | B&H Photo

  5. TG90 Portable Charger 6000mah - Amazon

  6. M1 Macbook Pro with Slipdrive

Travel Comfort

  1. OR Helium Jacket - Amazon

  2. Sony XB910 - Amazon

  3. Ombraz Sunglasses - link

  4. Fleece beanie and fleece gloves

  5. Garmin Messenger - Amazon

Bonus -

  • Compression Packing Cubes - Amazon

  • Microfiber Cloth for keeping gear dry (small)- Amazon


The Gear

Tenba Tools Cable Duo 4 - Amazon | B&H Photo 

This small dual-sided Tenba bag is a key component to staying organized. I love the see-through sides so I can quickly tell at a glance which zipper to open and on one side you have elastic to keep cables organized.   I keep all my basic charging cables in here plus a small power puck along with a camera remote and one of the best multitools for photographers, the Leofoto tool.

Leofoto Tool - Amazon | B&H Photo

This came with an older Leofoto Tool tripod I bought but they sell it separately for $12 bucks. It’s basically a plastic carabiner/keychain thing with the three common sizes of a hex wrench, a flathead screwdriver, and a bottle opener.  I keep mine inside a small bright orange drawstring bag along with a spare tripod plate. I really like having this bright little bag - it’s super easy to quickly find in my bag. I am not sure where it came from but I also have a small green bag that I use to keep charged camera batteries. These colorful bags make it that much quicker to spot and know what's inside. Look around your house and see if you can find some little colorful bags to repurpose for organization or you can buy similar ones on Amazon.  

A good L-Bracket - Search B&H Photo

 This wasn't on my initial list until Theresa Rice suggested it. The only excuse I can come up with for leaving it off the list is it is permanently attached to my camera and I forget it is not an extension of the camera. An L-Bracket allows you to easily switch your shooting orientation when on a tripod. And especially when shooting vertically it allows you to keep your camera centered over the tripod for better stability and better results when shooting a pano. They can also provide some protection in case you drop your camera some L-brackets can provide a larger area to grip. Though, these days I like the simpler ones. I do recommend you spend the money on the bracket designed specifically for your camera. The fit and function of those are usually the best.

Headlamp - Amazon | B&H Photo

A good headlamp is a must if you plan to shoot at night but even if you just want to catch sunrise or sunset you may find yourself walking in the dark and having a hands-free light can keep you safe. Or, it's super helpful when looking through your bag it doesn’t even have to be that dark for things to hide in the corners. I have two requirements with a headlamp - it must be rechargeable via USB-C and it must have a separate and easy red light on and off.  This Fenix isn't cheap but it does exactly what I need, is super bright and you can even remove the light and clip it somewhere else.    One related bonus recommendation - Adding glow-in-the-dark tape to the legs of your tripod makes it easy to find in the dark and can help others avoid tripping or knocking into your setup. 

TG90 Portable Charger 6000mah  - Amazon

A small USB Power bank - I always want some spare power on hand for my phone or camera but I don’t want to add a heavy bank to my bag. I found this small battery last year - large enough for a full recharge but light enough that it’s unnoticeable in my Tenba bag. Built-in USB-C and lightning cords make it super easy to pull out of my bag and use.  This one is a 6,000mah and costs less than $30.

Slipdrive - HD Sleeve - Amazon 

Hard drive Pocket - if you have been on any workshops with me in the last year or two you probably heard me describe this as life-changing, that might be a little over the top but I truly love this pocket. It simply sticks to the back of your laptop and holds a HD. This makes working while traveling so much better - no more worrying about dangling drives and disconnections while you are working. This one is for smaller SSDs but you can buy slightly larger ones -though really you should be traveling with an SSD. They are rugged, fast, and require less battery power from your laptop.  I recommend the 1 or 2tb SanDisk SSDs. I like the pocket because I can also slip the USB cord in there for travel. If you don’t like the idea of a pocket you could simply add velcro to your laptop and each HD.

Bonus Item 

Recommended Macbook M1 - B&H Photo | Amazon

Yes, I bring a laptop with me on just about all my travels and I am so happy with my Macbook M1 - these silicon chips are just fantastic. It breezes through lightroom and photoshop and I can easily edit 8k footage from my mirrorless camera.  And it offers a fantastic screen that I don’t need to calibrate, great battery life and I love that I can charge via the MagSafe or any of the USB-C ports - which makes it even easier to travel with. I leave the big heavy puck at home and just use this smaller anker 65W charger that provides me several ports -just know that the 65W is shared between the ports so when you have several devices plugged your MacBook will charge slower but in almost a year of using this I have never run into an issue.  
This Base Model M1 Macbook is just fine for Lightroom & Photoshop - ON SALE! or Power users can go for this version with Upgraded Ram, SSD and More Cores a LR, PS, and Video editing beast

Travel Comfort Items

OR Helium Jacket - Amazon

A lightweight Rain jacket that doubles as a windbreaker is on David McKay’s list too and I agree!! It is always a great idea no matter what your destination to have something like this with you.  Outdoor Research has ones that I really like - these are minimal lightweight jackets that I just make sure are always with me. If I am going someplace where different weather is going to be experienced I bring a more substantial rain jacket too. 

Sony XB910 - Amazon 

Noise-canceling headphones - I resisted for years but last year during one of the amazon sales I picked up a pair of budget-friendly Sony over-the-ear headphones and they make flights much more peaceful and enjoyable.  

Ombraz Sunglasses

A recent conversation with an optometrist reminded me just how important it is to protect your eyes from the sun.  I love these lightweight armless sunglasses from Ombraz they are so travel-friendly, durable, and of excellent quality. And they plant a mangrove tree for each pair sold. 

Fleece beanie and fleece gloves -

Similar to the lightweight rain jacket I almost always throw a fleece beanie and a pair of lightweight fleece gloves in my bag.  I don’t like being cold but even more than that I don’t like missing photo opportunities because I am uncomfortable and a simple and very packable pair of hat and gloves can make a real difference.  Outdoor Research makes a pair of gloves called the Flurry Sensor but I recommend you go to your local outdoor store and try them on to find ones that fit best for you.  

Garmin Messenger - Amazon 

This device allows me to use satellites to send messages to friends and family even when I am far away from any cell phone tower and more importantly if something serious happens I can activate the SOS button which will alert the appropriate local authorities and trigger a rescue. This is especially nice peace of mind when out in the backcountry with clients.  A bonus feature is the GPS tracking which is fun to share with friends and families when you are off adventuring and can also be used to geotag your photos. This device is becoming less necessary as cell phone manufacturers and service providers are starting to offer emergency messaging options but this little robust device is handy to bring along for any more remote journeys.  Note that a monthly subscription plan is needed along with the device. This ranges from $12/month (with annual payment, $15/month without), all the way up to $50/month (with annual payment, $65/month without). You can suspend monthly charges, so if you only use the device certain months/seasons, then you can turn it on/off as needed. Garmin now offers a newer more message-centric device that you might want to consider.

Bonus -

  • Compression Packing Cubes - Amazon

  • Microfiber Cloth for keeping gear dry (small)- Amazon

What Items are on your always-bring list?


Best Camera at Every Budget - Part 1 (Updated)

I am often asked for camera recommendations and recently created this doc that should help you make some decisions about the camera and camera system that will work best for you. These are my full frame mirrorless camera recommendations as of Fall 2022. I will add additional options soon. - Here is the link to the spreadsheet shown in the video below.

Watch the Video for the discussion and reasoning behind these Full Frame Recommendations

BIG Lightroom and Photoshop Changes - October 18, 2022

Photoshop, Lightroom Classic, and Lightroom just got significant updates

The Photoshop Update is significant enough that there is now a new App - 

The new version is Photoshop 2023 or v24.0 - The icon remains the same. In the creative cloud app, you will now have two Photoshops listed the new 24.0 with INSTALL and the existing v 23.5 with an Update button. They do this for the professionals that need time to migrate plugins and tools over from the old version to the new version and to confuse the rest of us.  I would just install the new one and once you confirm it is working correctly after a few days of use, you can uninstall the old version of Photoshop.

Note when I installed the new version of Photoshop I was asked if I wanted it to remove the old versions. I did not check that box and will manually uninstall through the creative cloud app once I confirm the new version is working correctly. 

And finally if opening from Lightroom you do want to confirm that it is using Photoshop 2023 now and not Photoshop 2022.

Lightroom Classic does not get a new program BUT after updating it does prompt you to upgrade the catalog.  This will create a newer copy of your catalog and after a few days of use and you confirm that everything is working correctly you can delete the old catalog to save space. The dialog below is also a great time to change the name of your catalog if it has gotten cumbersome with lots of v10-v11-v12-2 stuff in the name. 

WHAT’S NEW? 
Lightroom - 

Another BIG Masking Update - Select People, Objects, or Background
in the Masking panel. Easily make precise adjustments to one or more people, objects, and backgrounds in a photo using the mask. 

To Use the new feature click the Mask tool (Shift + W) and then choose one of the AI masks provided.  If there are people detected in the photo Lightroom will automatically populate the People section and you can click on the All People to select all the people or pick one individual and then add additional people to mask through a secondary process.  And you can select specific areas of each body to mask - maybe all the legs are in shadow or maybe the skin tones of the faces are off.

If you choose Objects Lightroom will give you a brush (default) and you quickly brush over the desired object - lightroom will then refine that selection. You can switch from the brush style selection to drawing a rectangle around your object.  

The masking dialog shown above is only available before you create any masks. Once you have masks you have the extremely similar but visually different mask panel available to you.

Better Cloning Tool - This has been requested for so long!!!!! 

To use you start with the Healing Tool (Q). In addition to the existing heal and cloning tools WHICH ARE TERRIBLE there is now a Content-Aware Remove tool. In the image below it is the first tool shown and now the default tool when you press Q. You use the tool by drawing over the offending object. Lightroom processes for a moment and covers the area with new content. If it doesn’t do a good job you can right click and select new source.  Make sure your Tool Overlay is on Auto so when you mouse off you can see the edit without the border. 

A few additional changes-  Adaptive: Portraits are a group of presets in Lightroom Classic that will automatically mask and enhance portraits with just one click.  Remember you can make your own versions of these. 

Swap the left and right layout of the panels in Lightroom Classic. To swap, select Preferences > Interface > Swap Left and Right panel groups. Once done, restart the Lightroom Classic app to see swapped panels.

Lightroom Classic will now display the parent folder during import, by default, to help you efficiently organize and access photos. 

You can now disable the Auto-advance settings during auto-import. 

Photoshop - 

Selection improvements that enable users to hover over, detect and make detailed selections of complex objects with a single click, creating higher quality and more accurate selections of elements such as skies, foregrounds, subjects, and hair, while preserving detailed edges.

To use the new feature click the Object Selection Tool (W) and well that’s it... the tool now just works better. You should also see more precise and accurate selections when choosing Select > Subject or Select > Sky.  But, you might be like me and realize that there are options you never explored within Object Selection Tool- like the Select Subject drop-down that allows you to determine if the brains doing the object selection is on your computer(faster) or in the cloud(more precise). 

You can also choose a soft or hard edge to your selection.

I covered more of this tool in a recent PEN video - Quick & Powerful Object Selection Tool

One-Click Delete and Fill selects and removes objects from images, automatically filling the removed area using content-aware fill.

To use the new feature make your selection with the Object Selection Tool and hit Shift + Delete key to instantly remove your selection. Also, while working with other Photoshop tools such as the Lasso Tool, you can right-click the mouse to access the contextual menu and select Delete and Fill Selection to remove your selection. 

Photo Restoration Neural Filter (beta) helps Photoshop on the web users bring old or damaged photos back to life, using machine learning to intelligently eliminate scratches and other minor imperfections on old photographs.

To use the new feature load a photo and click Filter > Neural Filters... Find the Photo Restoration filter (at the bottom) and if this is the first time you have used it requires a quick download.  There are sliders to adjust the restoration process.  Combine this with the already existing Colorize neural filter and you can really bring some of these older black-and-white photos to life. 

There is also a new collaborative tools for working on one image with multiple team members and the iPad version is getting the quick Delete and Fill option.

Have Questions? Just send me a quick email or use the contact form.

My Backup Strategy from Field to Home

I JUST LOST ALL MY PHOTOS!!


I hear those words from fellow photographers more often than I like and it just makes my stomach drop. I know from my own past experiences that it is a terrible feeling to realize you just made a mistake or suffered an accident that wiped out even just one photo. Many years ago I put in place a system that has served me well and I want to share it with you here.

The Strategy

In the field I shoot with a camera that has two card slots. I shoot RAW simultaneous to both cards. I use a pair of larger, 128GB, or 256GB cards in my camera. I always try to use the same size in both slots to keep this as simple as possible.

If you have a camera with only one slot I do recommend you shoot RAW + JPEG as JPEG files can be easier to recover from a corrupted card or in case of accidental formatting.

I rarely fill the larger cards in a single day of shooting and on most trips cards these sizes will last me several days. Each evening I download (copy) the photos from the camera to my working drive and use Lightroom's backup on Import tool to make a second copy of those files to a second drive. So, on day 3 of the trip, I have all the photos I captured so far with me still in the camera and all the photos from the previous days on the working drive and on the backup drive. This means that all of these photos exist in THREE places and the working drive and backup drive stay separated in the hotel room. When I do fill the pair of cards I remove them from the camera and place them together face down in my card wallet. They will NOT get used again during the trip. A new pair of freshly formatted cards are inserted and the process continues. The card wallet remains with me in a safe location in the camera bag - it is either tethered to the camera bag or it is in a smaller zippered pouch that stays closed at all times.

At the end of the trip, I have a handful of used cards upside down in my wallet. These will NOT get used or formatted until all home backups have been completed.

If a flight home is involved my working drive stays with me in my camera bag, and my backup drive ( I make sure I have a complete backup of all photos before traveling home and a backup of the Lightroom catalog) goes in my checked luggage.

Once home I give myself a few days to finish deleting the junk images and other rejects and then I run the sync software that copies everything new on my working drive and places it on a BIG hard drive in my office. That big hard drive in my office is connected to the online backup service Backblaze (get 1 month free with that link) which will then automatically upload those files to their cloud service. I have fast upload speeds so that usually takes less than a couple of days.

As I prepare for my next trip or shoot I will check online to see that the backup has been completed before I start to format cards or wipe the travel backup drive. Occasionally I will need to use my cards before the backup has been completed or on trips where I shoot lots of videos I might fill enough cards that I have to reuse some while traveling. I will only reuse ONE of the pair of cards - never both. The working drive and backup drive that I travel with are large enough to use for a full year of photos.

Some of you have cameras that require a very expensive card in one slot and you probably don't want to buy multiple cards that expensive. I understand and recommend that you just switch out the second card (the more affordable SD card) when the pair is full and reuse the expensive card but you need to be 100% sure that you are writing to both cards and this is only after you have imported and backed up your photos on the two separate drives.

Recommended Gear - 

SanDisk SSD drives are my working and backup drives while traveling. These small solid drives are extremely rugged and lightweight making it easy to always bring them along.  I use the 2TB size and use the newer fast V2 for my working drive and the older 2TB for my backup drive.

  • Working Drive - SanDisk 2TB Extreme Portable SSD V2 [Amazon Link] [B&H Photo Link]

  • Backup Drive - SanDisk 2TB Portable SSD [Amazon Link] [B&H Photo no longer sells the slower drives]

Feel free to buy two of the slower and more affordable drives as both your working and backup, just be sure to clearly label them.

For the larger backup drive at home, I recommend WD 10TB Elements Desktop External Hard Drive [Amazon Link] [B&H Photo Link]

Note that this is a slower drive and works best as a backup drive, not a working drive.  I use the 2TB SSD as my working drive even when home. 

Need more SD Cards? I recommend SanDisk 128GB [Amazon Link] [B&H Photo Link]  or the faster ProGrade Cards in 128GB [Amazon Link] [B&H Photo Link] (x2 to save $)

The Card Wallet I use - Think Tank Pixel Rocket [Amazon Link] [B&H Link] I like the orange one - just that much easier to find in a camera bag.

Photographers Leaving Instagram

This video is brought to you by Squarespace.com - Easily Build your own beautiful website and display your photos how you want! Start at http://squarespace.com/photorectv to save 10% off your purchase.

Photographers are fleeing Instagram - low engagement, a switch to reels, too many suggested posts, video-focused and annoying bots are a few reasons. I take a look at Vero and Glass.photo and share why you might consider one or both and how important it is to have your own website for displaying your work.

Topaz Photo Ai - Combo Powerhouse? Plus a PS masking trick for power editing!

Topaz Photo AI - ON SALE - AUGUST 4, 2023!

Topaz Labs has just announced a new product designed to simplify denoising, sharpening, and enlarging your photos. I took some time to share a tour of this new software and run through three photos showing you how it works.  For photographers worried that the Denoising and Sharpening apps were complicated you will appreciate this very streamlined and straightforward approach with Topaz's Autopilot taking care of all the complicated bits. 

Here are the cliff notes from the video - 

  • Denoise and sharpen in one program

  • Automatic subject selection

  • A simple interface with Autopilot suggestions automatically improves your photo

  • Fast before and after preview slider

  • Raw or jpeg and batch processing of multiple photos

  • Easy round trip flow from Lightroom to Photo AI and back to Lightroom

Topaz Photo AI just hit version 1.5 and to celebrate Topaz is offering a nice discount. Buy Topaz Photo AI  NOTE - if you already own the Image Quality Bundle - Topaz Denoise, Sharpen and Gigapixel - this new software is discounted as long as you are current with your subscription to receive updates.

Get Topaz  Photo AI Here - They do offer a 30-day money-back guarantee. 

The Perfect Tripod!? FLM CP30-L4 II and CP30-S4 II- WIN!

The FLM CP30-L4 II is the best in class - no other tripod offers such a tall max height with this level of stability in this weight and price class. PERIOD.

The slightly smaller CP30-S4 II is a nearly perfect travel tripod for many of you.

Picking the perfect tripod is almost as difficult as picking the perfect camera bag but after lots of research, and trial and error I have picked the FLM CP30-L4 II as my favorite tripod.

You have a chance to WIN the FLM CP30-S4 II as part of our awesome Mongolia Photography Workshop. The CP30-S4 II is a fantastic travel tripod and will suit you perfectly for your Mongolia photography adventure.

Enter to win - http://photorec.tv/contest

Buy the FLM CP30-L4

Buy the FLM CP30-S4

All my tripod recommendations

Simple Aurora Photography Tips

in a few weeks - Sept 18th - Oct 2, 2022 - I will be teaching on a ship based photography workshop along the Greenland coast. We have a good chance of seeing the northern lights at this time of year and I want to share a few tips from my presentation on Aurora Photography.

A lens offering a focal length between 12mm to 24mm is best - it could be a prime lens fixed at one focal length in that range or a zoom lens that at least partially overlaps that range.  A maximum aperture of at least f/2.8 makes it easier to keep your ISO lower. Lenses good for astrophotography are great for aurora.

For our ship based workshop our shutter speed is going to be limited by the ship’s movement. 0.5 seconds might be the longest possible shutter speed for sharp shots.  On more stable platforms you can go longer but as you increase your shutter speed above 2 seconds you start to lose the interesting detail in the aurora. Ultimately shutter speed and ISO will be determined by the strength/brightness of the aurora.

Suggested Shutter Speed for Aurora - These are starting values

  • Bright fast moving aurora - Shutter speed between 1/4 and 1 second to capture the fine detail

  • Bright with slow movement - 1 second to 4 seconds

  • Faint with slow movement - 4 seconds to 8 seconds

  • Faint & distant - 8 seconds to 25 seconds

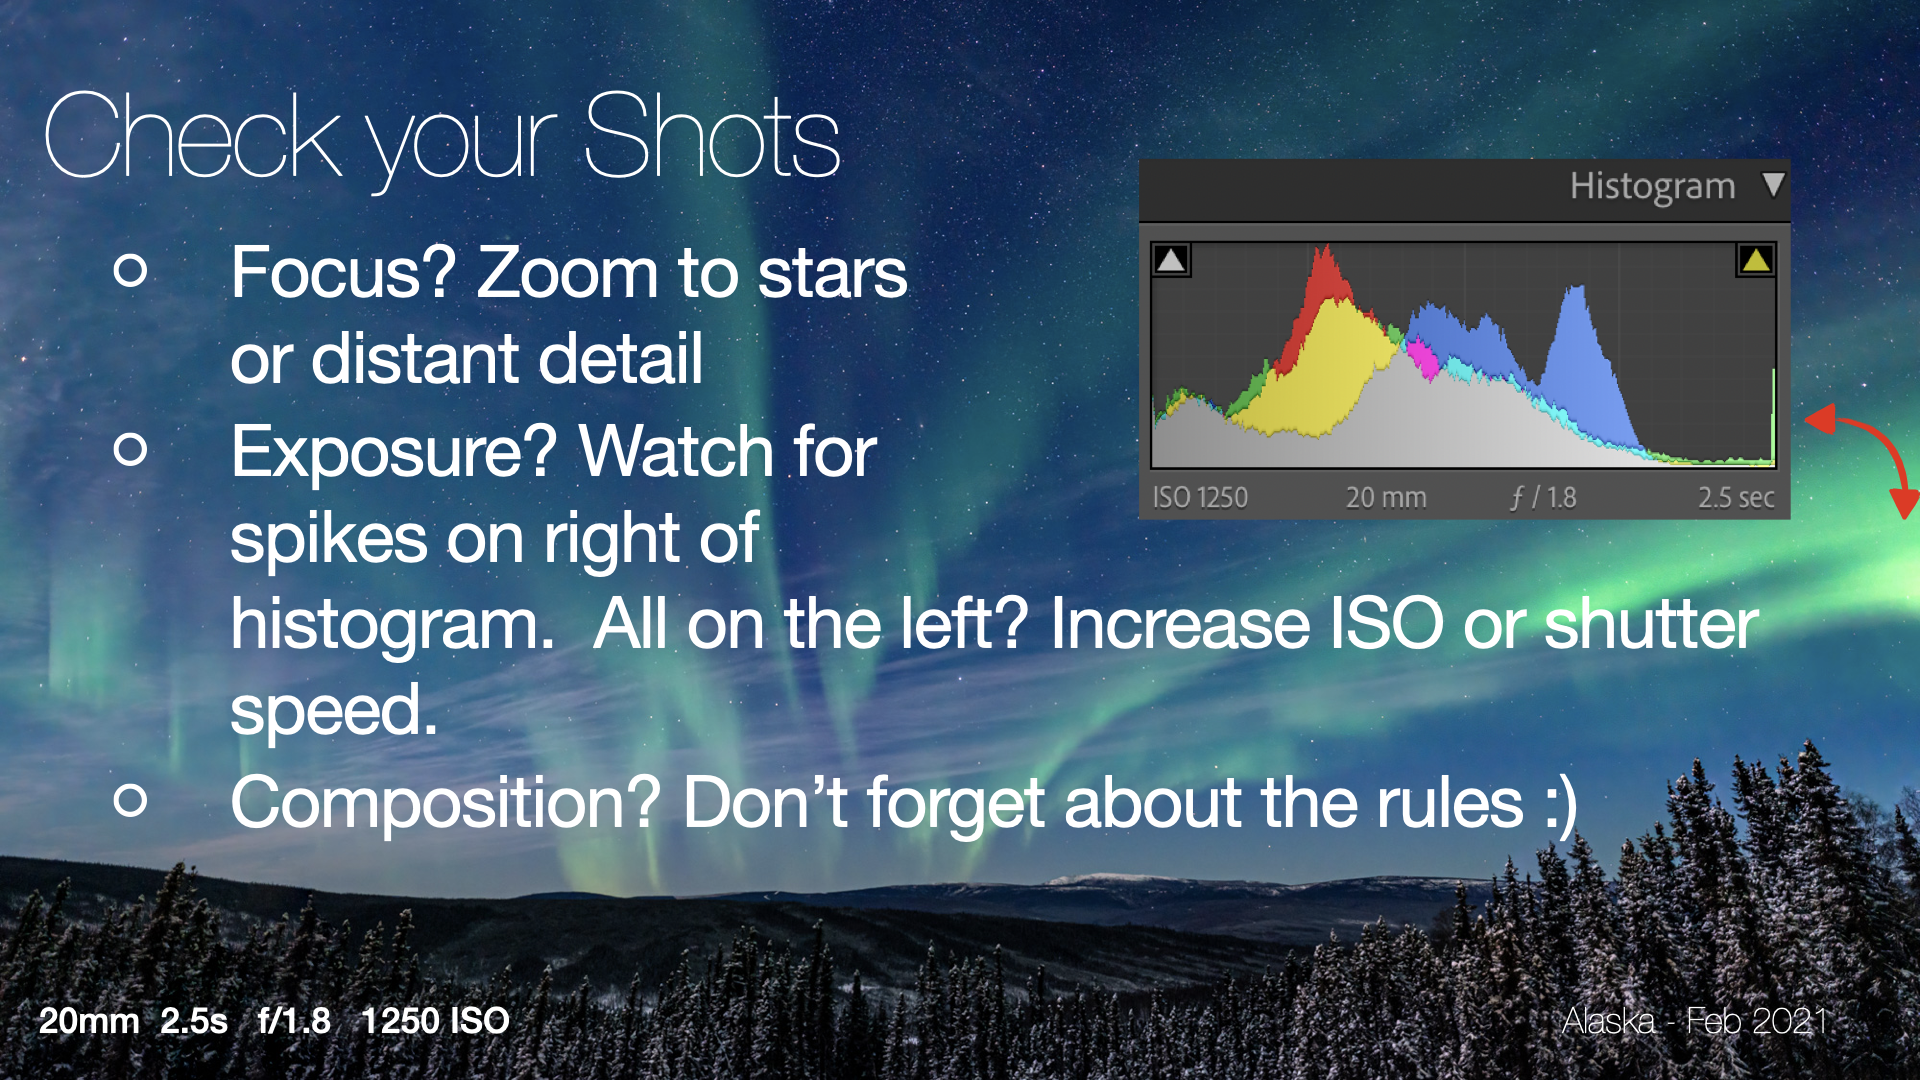
Check those first shots - Zoom in to make sure your focus is accurate. Look at your histogram to check your exposure. - watch for spikes on the right signifying areas that are over exposed. Or if all of the data is stuck far left you should increase your ISO or shutter speed to achieve a brighter image.